When a friend posted her pumpkin pie garland hanging on her mantel, I fell in love and knew I had to have one in my home! A quick internet search revealed many premade options available for purchase. However, I was determined to save my pennies and decided to head to the craft store to try to make one on my own. Turns out it’s pretty easy!
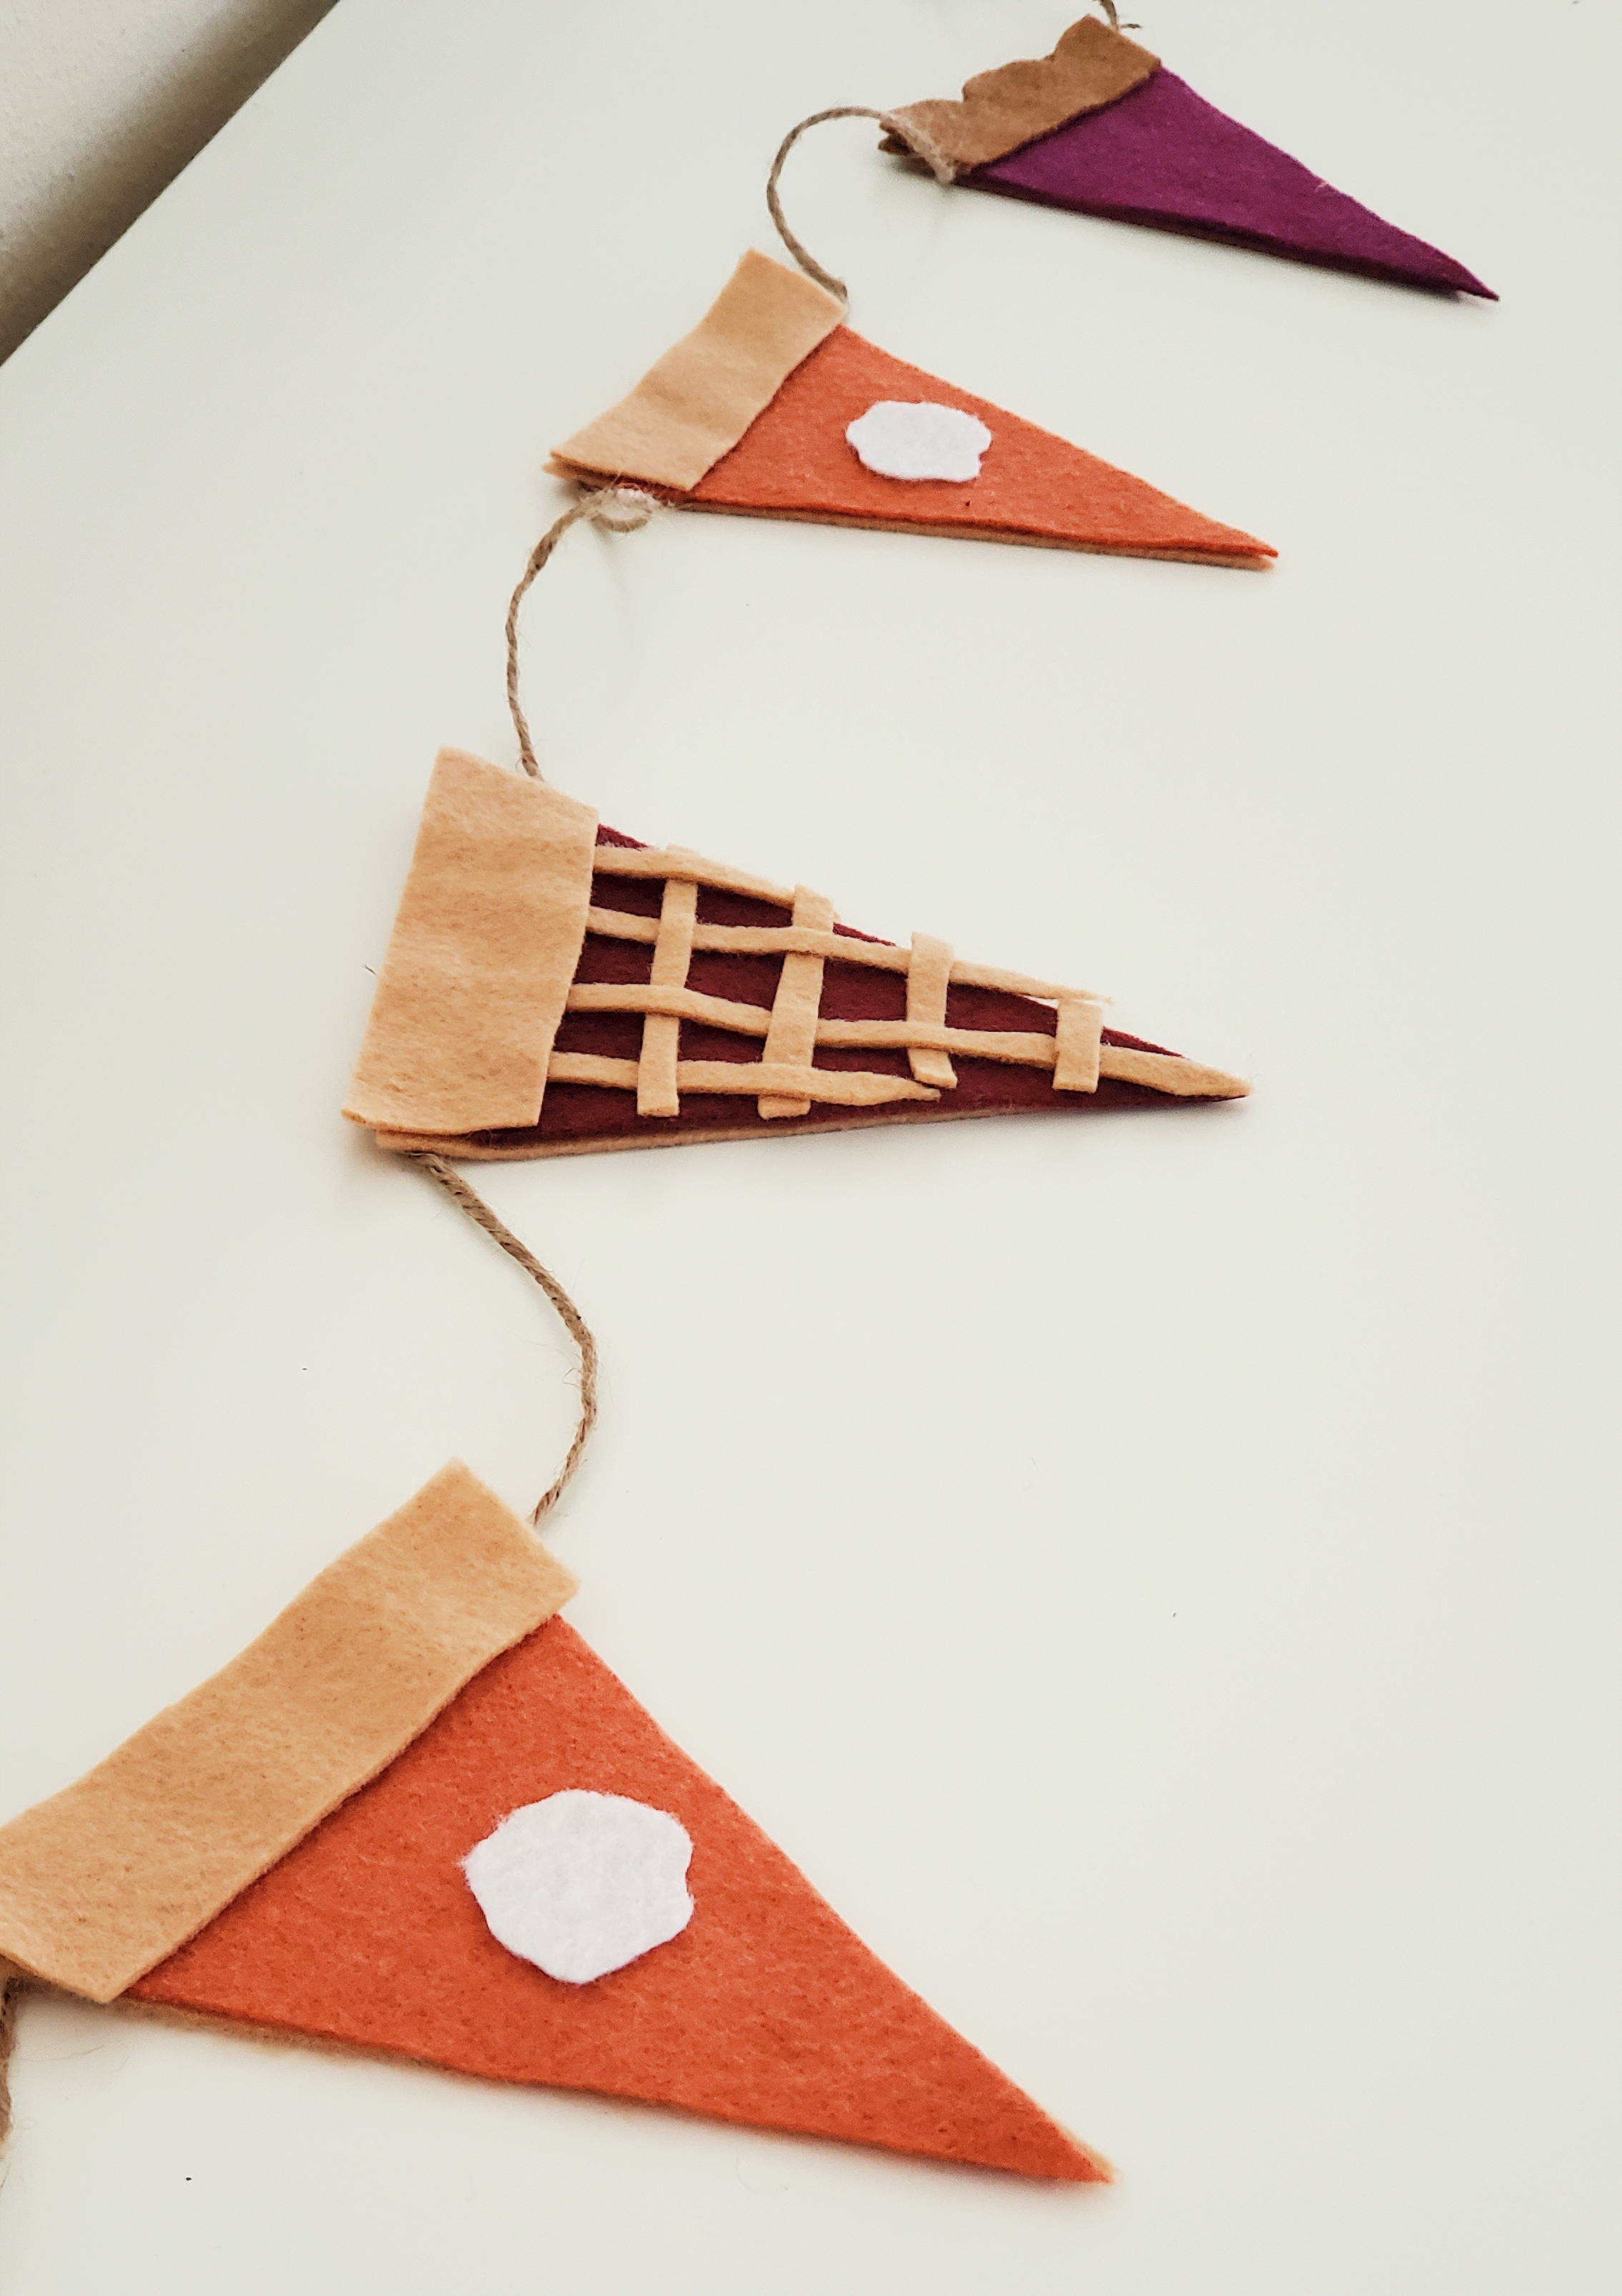
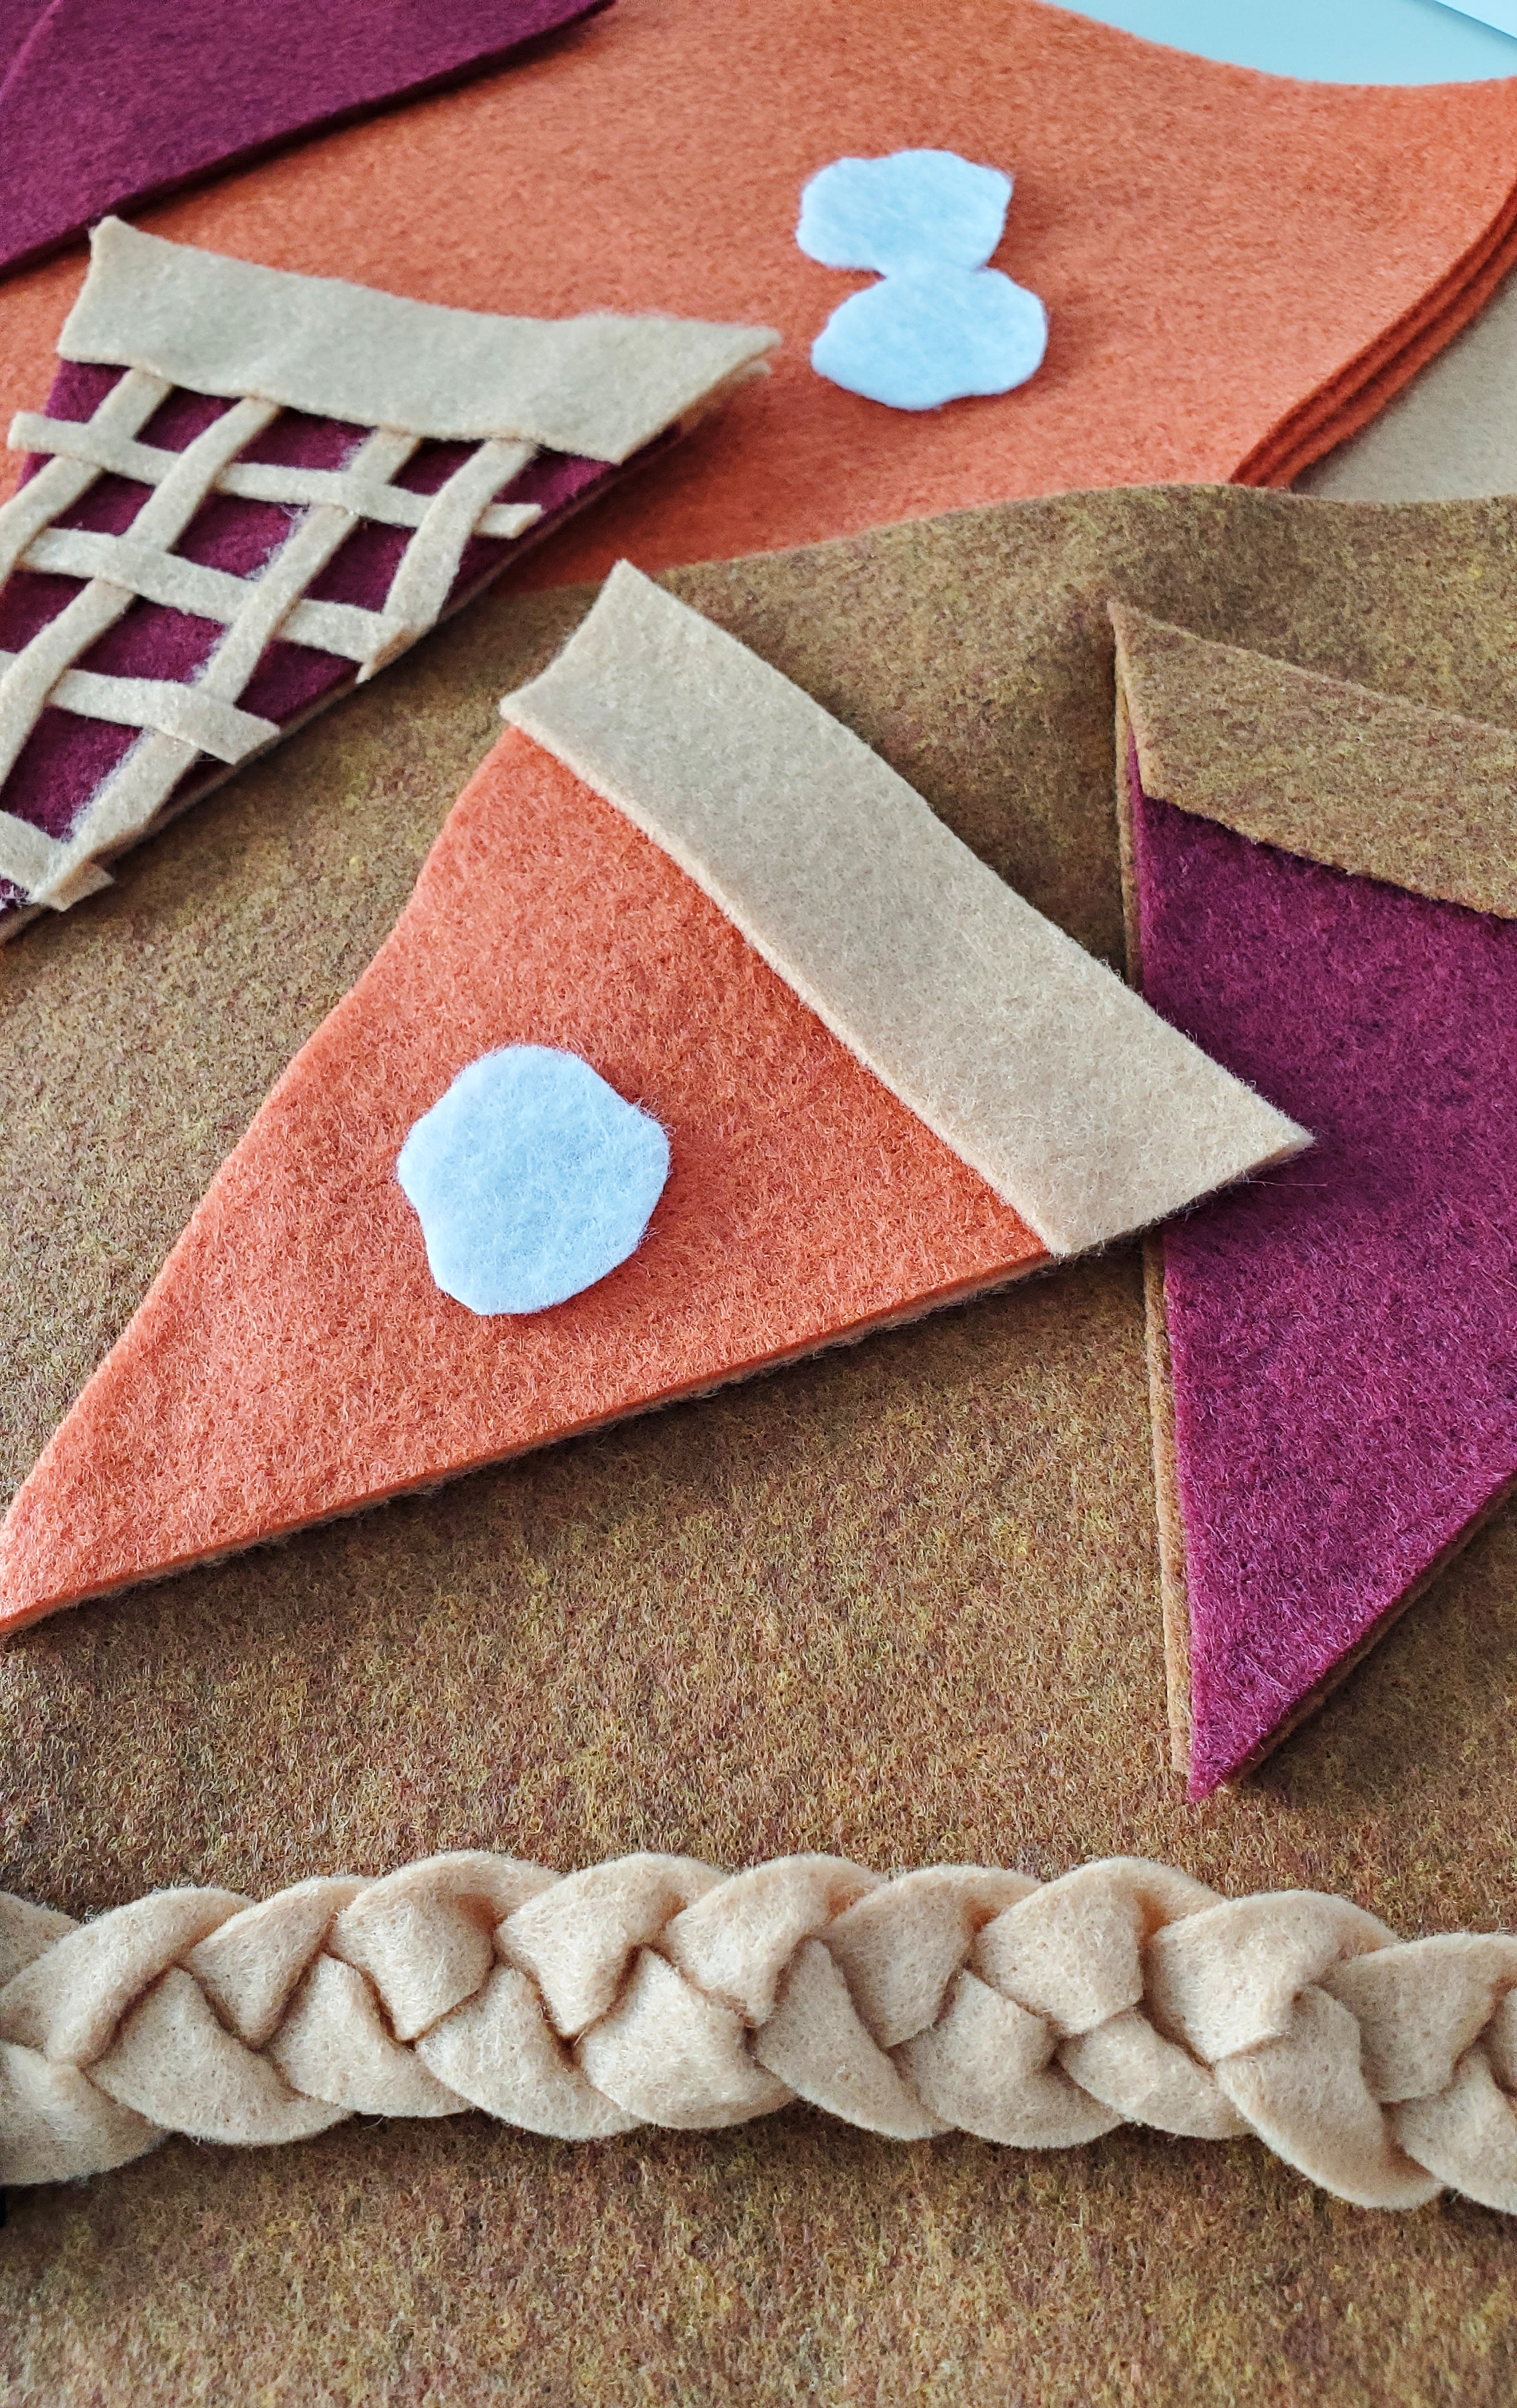
Most online pie garland tutorials are relatively simple, sticking with basic pumpkin pie. However, the rainbow of colored felt pieces available at the craft store inspired me to incorporate more types of pie and thereby more fall colors. I grabbed some violet for berry, some maroon for apple, and orange for pumpkin, of course!
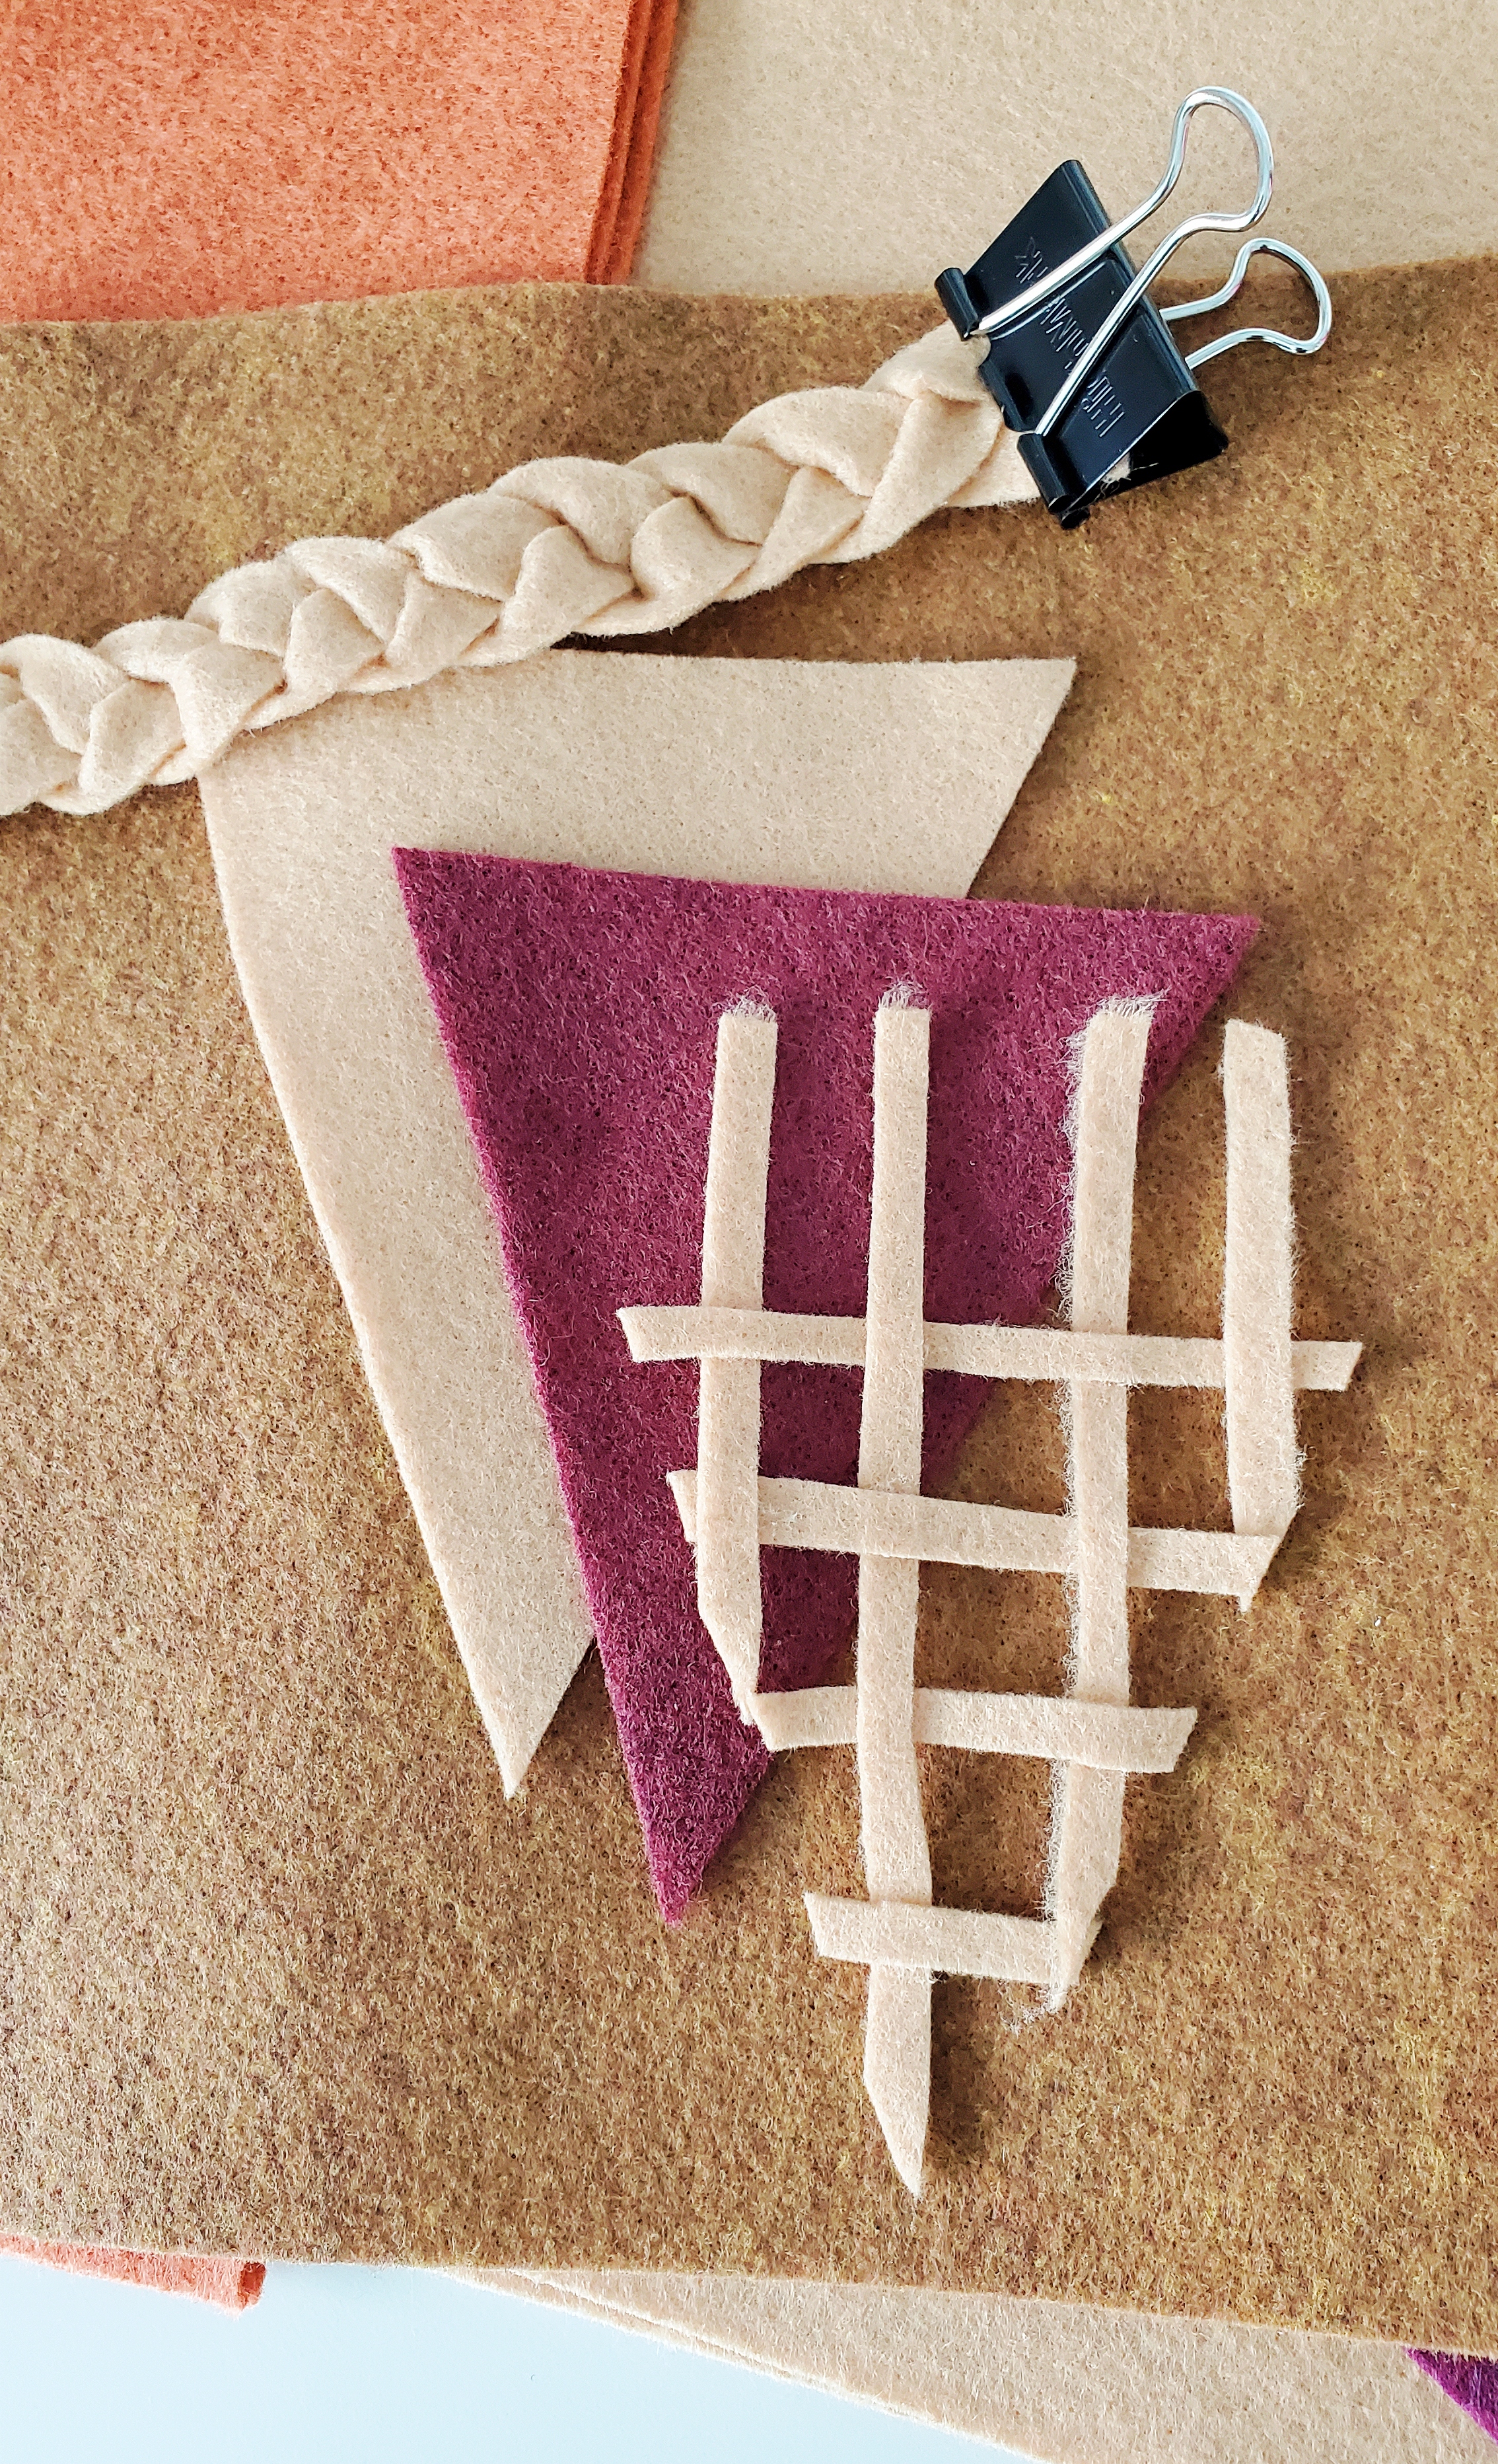
For the crust, I grabbed two different shades of brown. I was also inspired by actual decorative pastry, like braided crust and lattice tops. Turns out that’s pretty easy, as well!

Supplies you’ll need
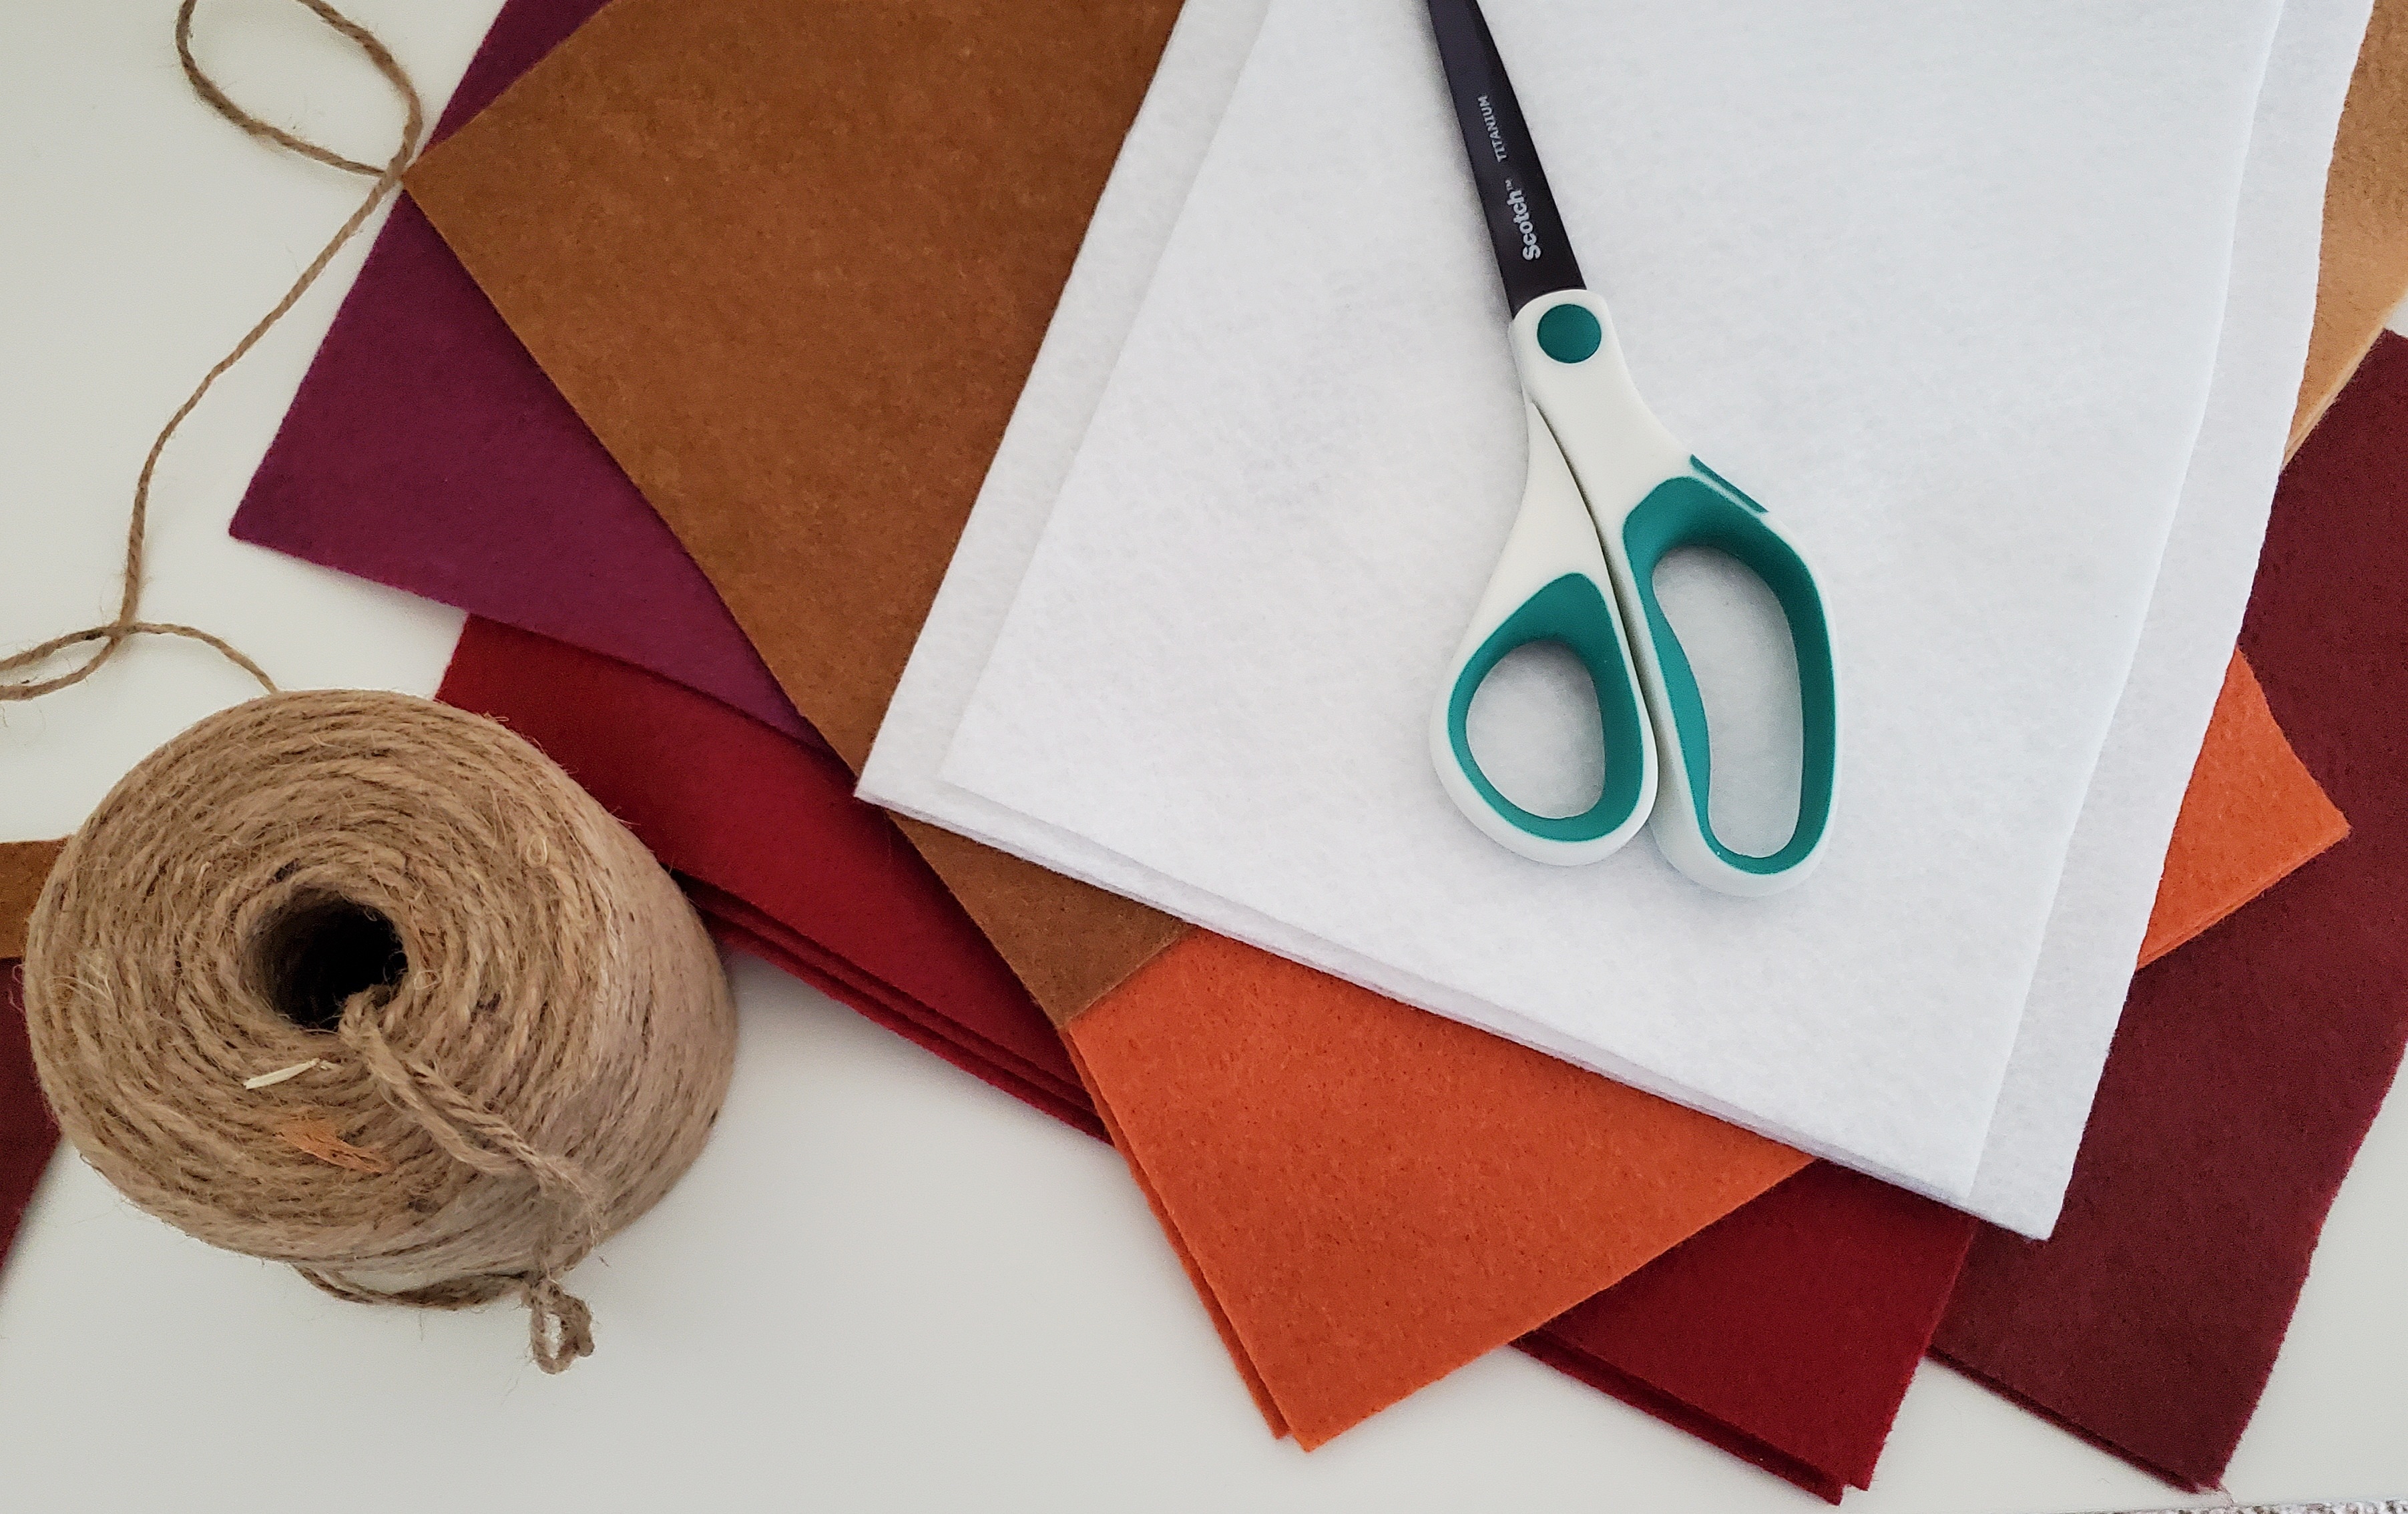
Basic crafting felt
The amount you need depends on how long you want your garland to be. I got 4-6 triangles out of each sheet of felt.
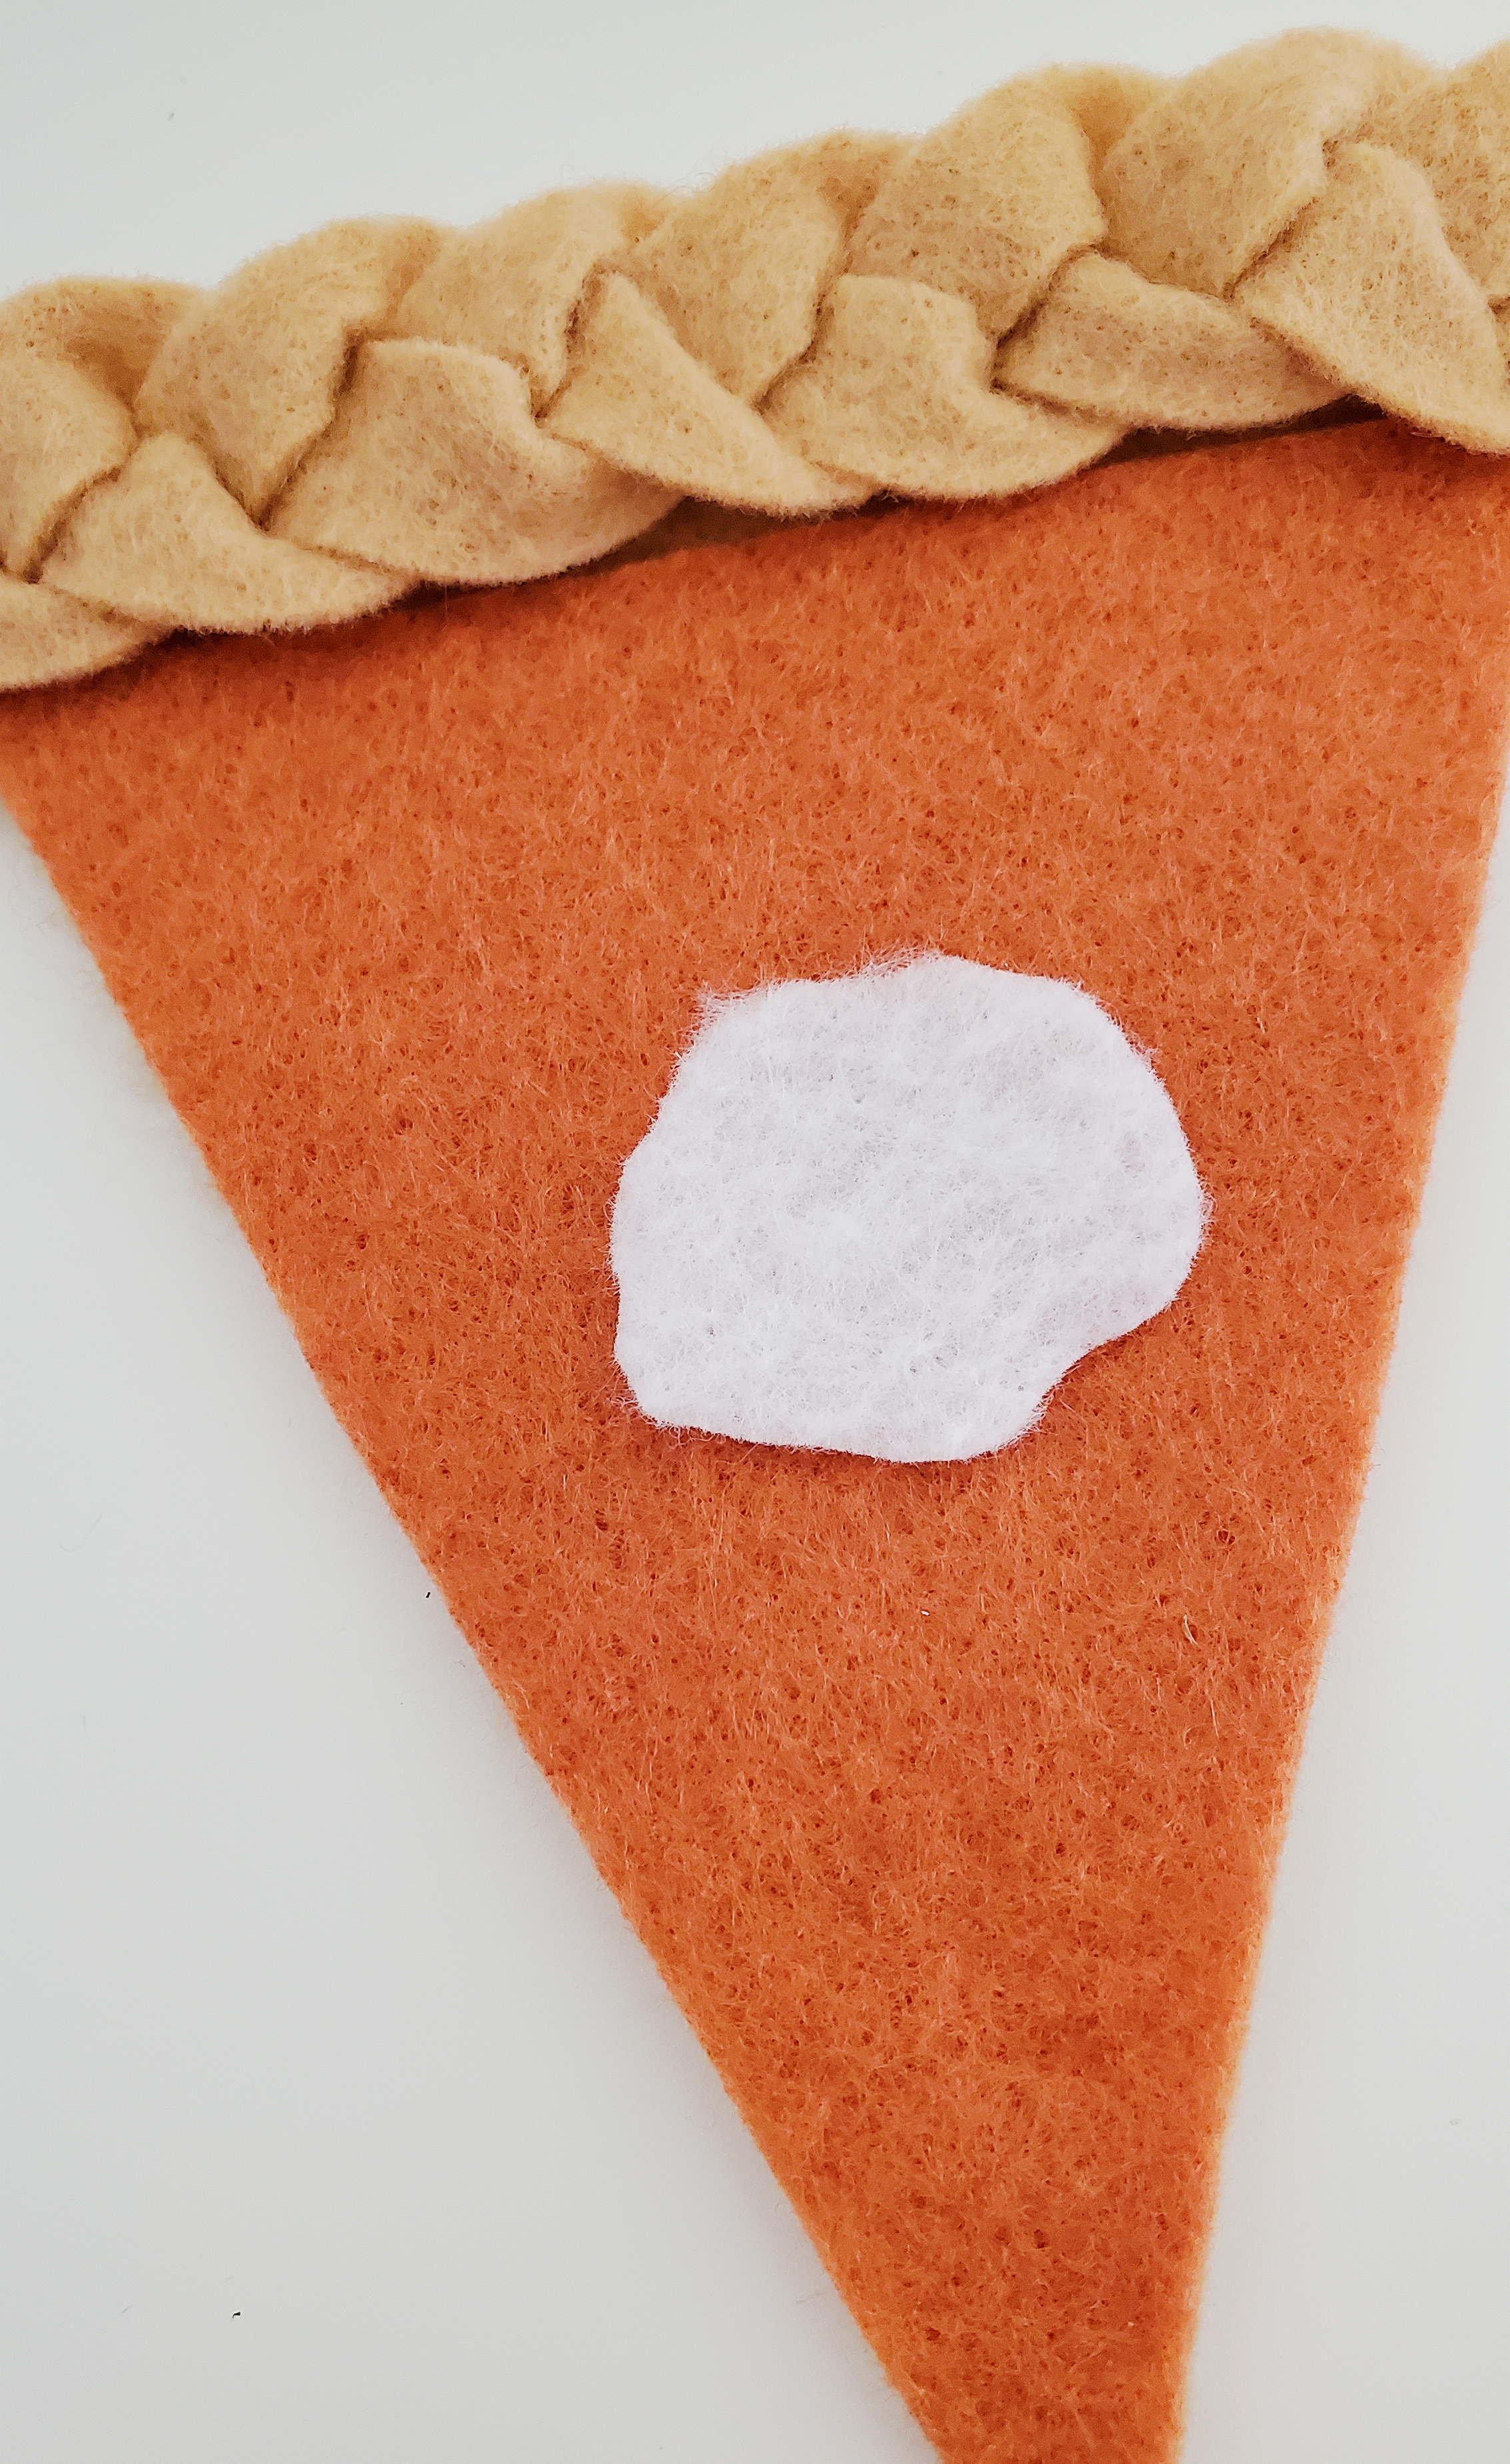
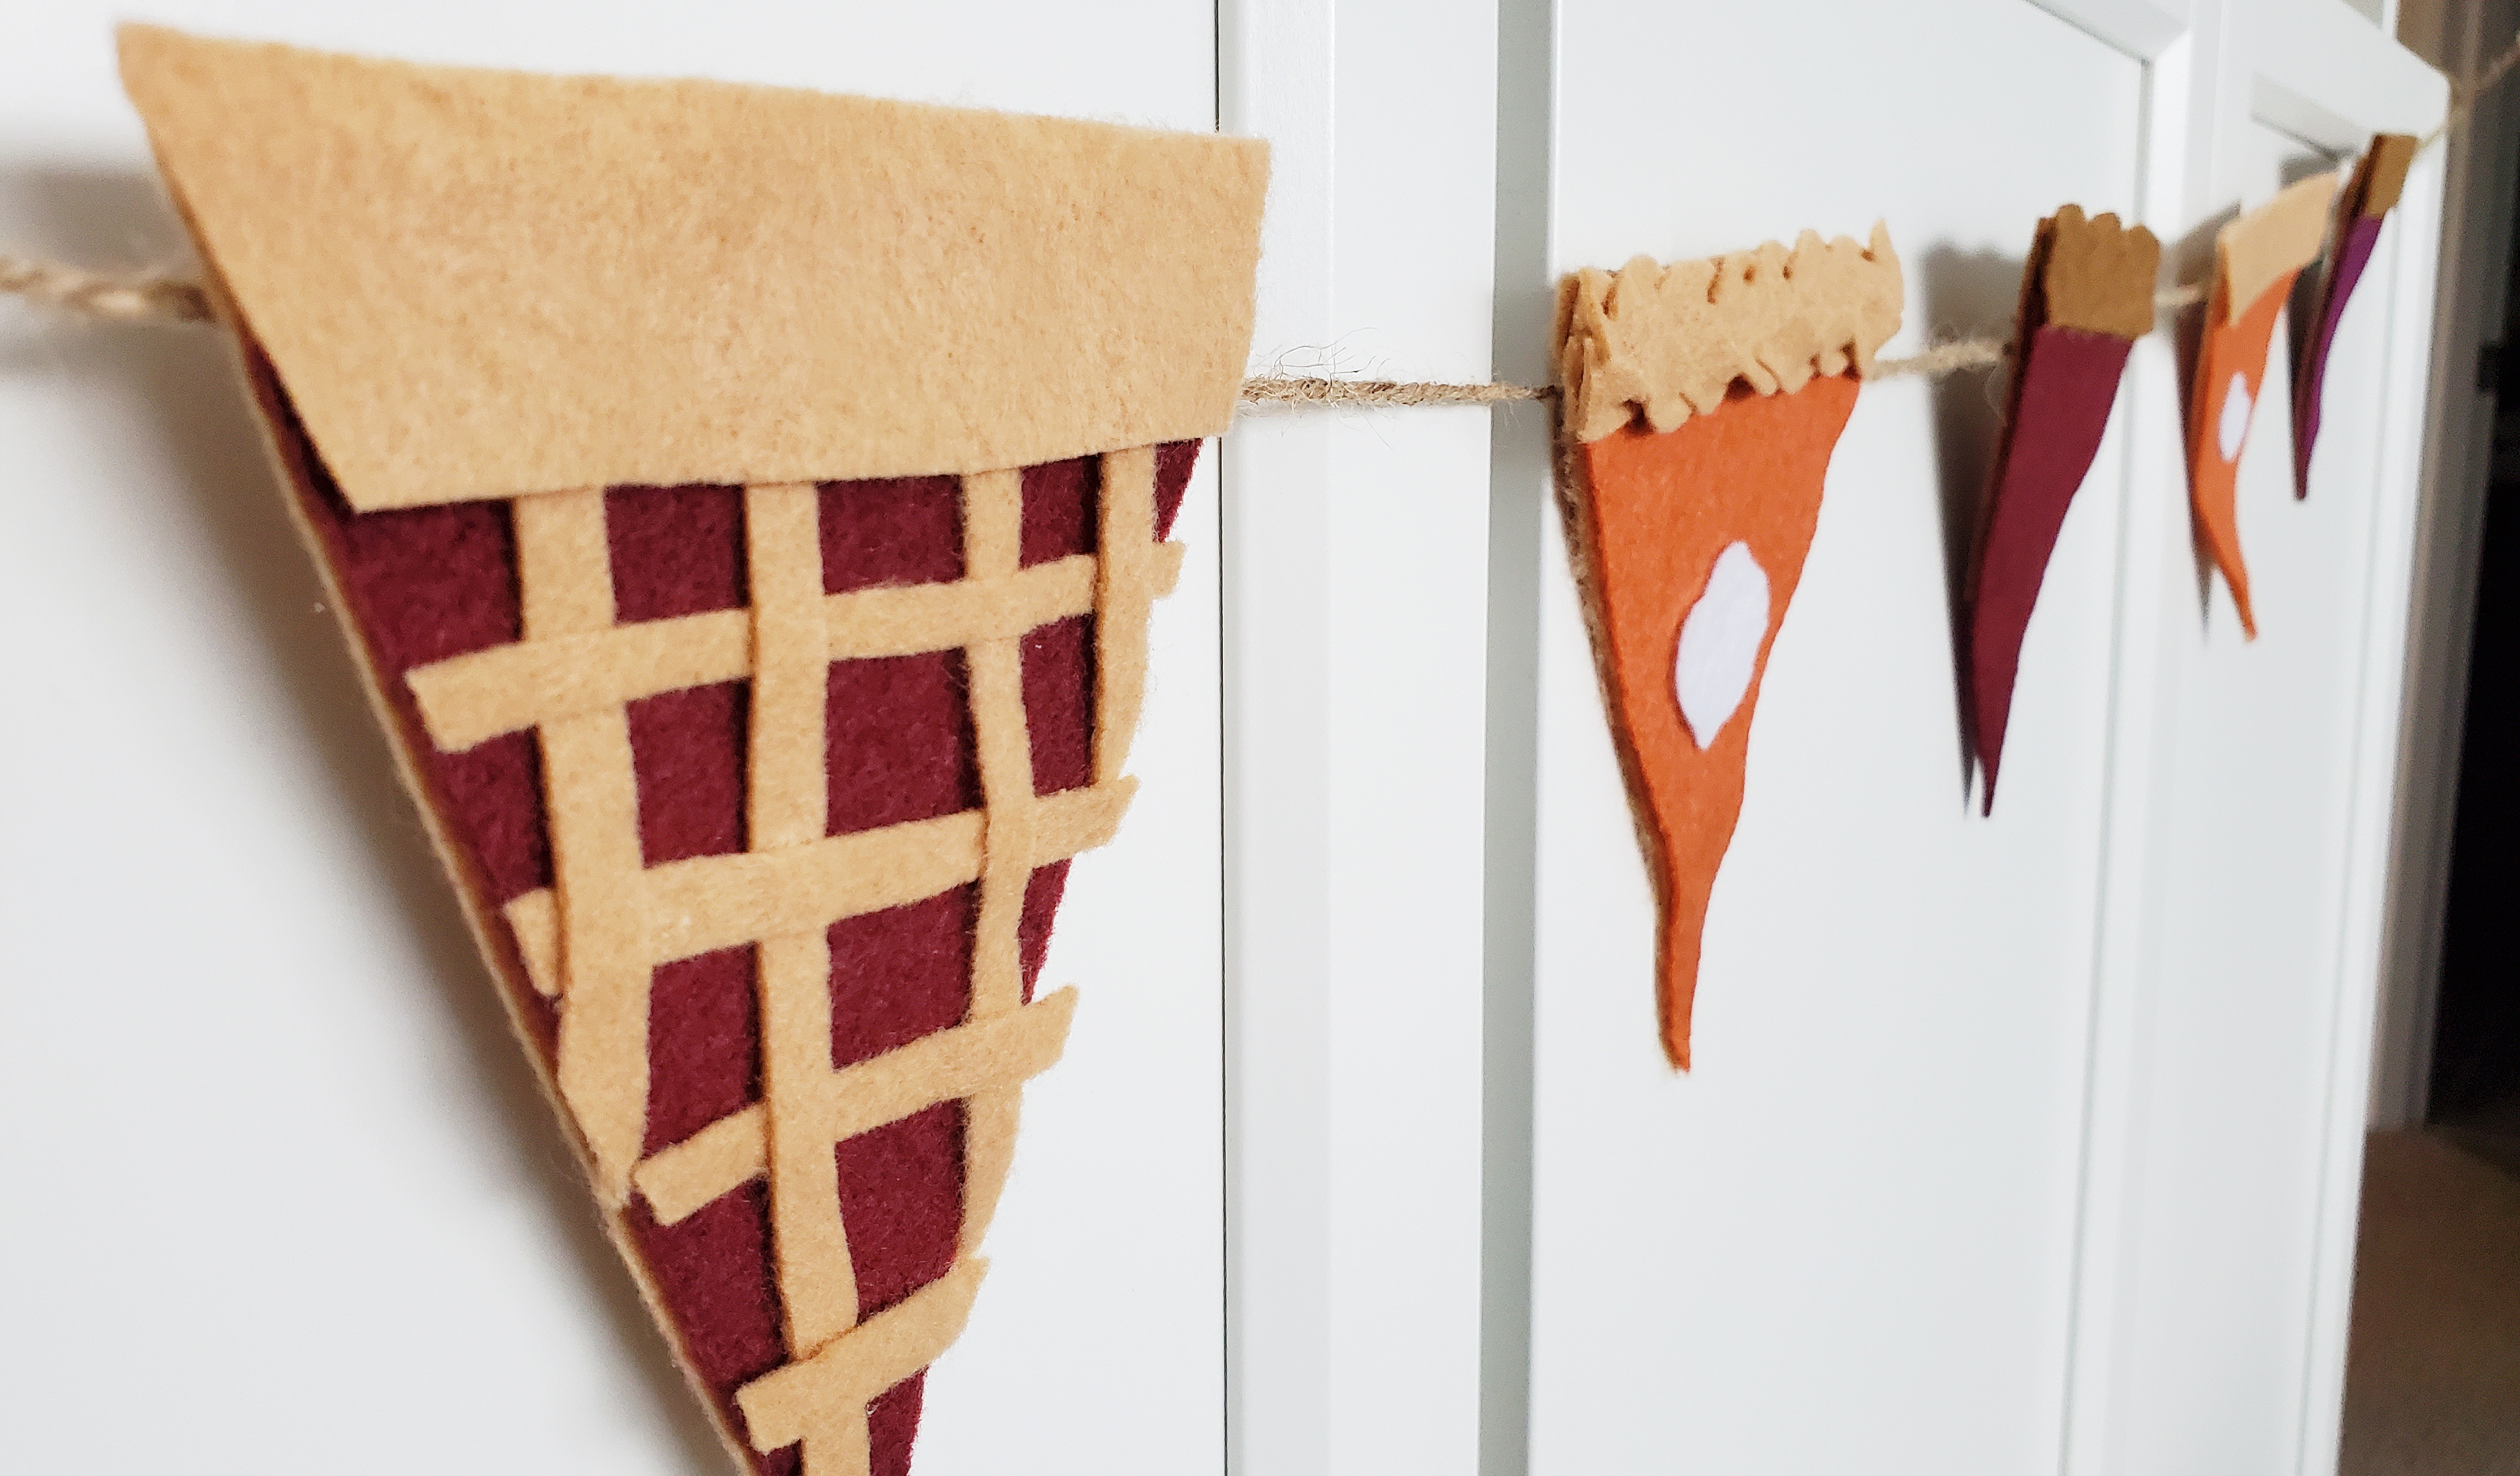
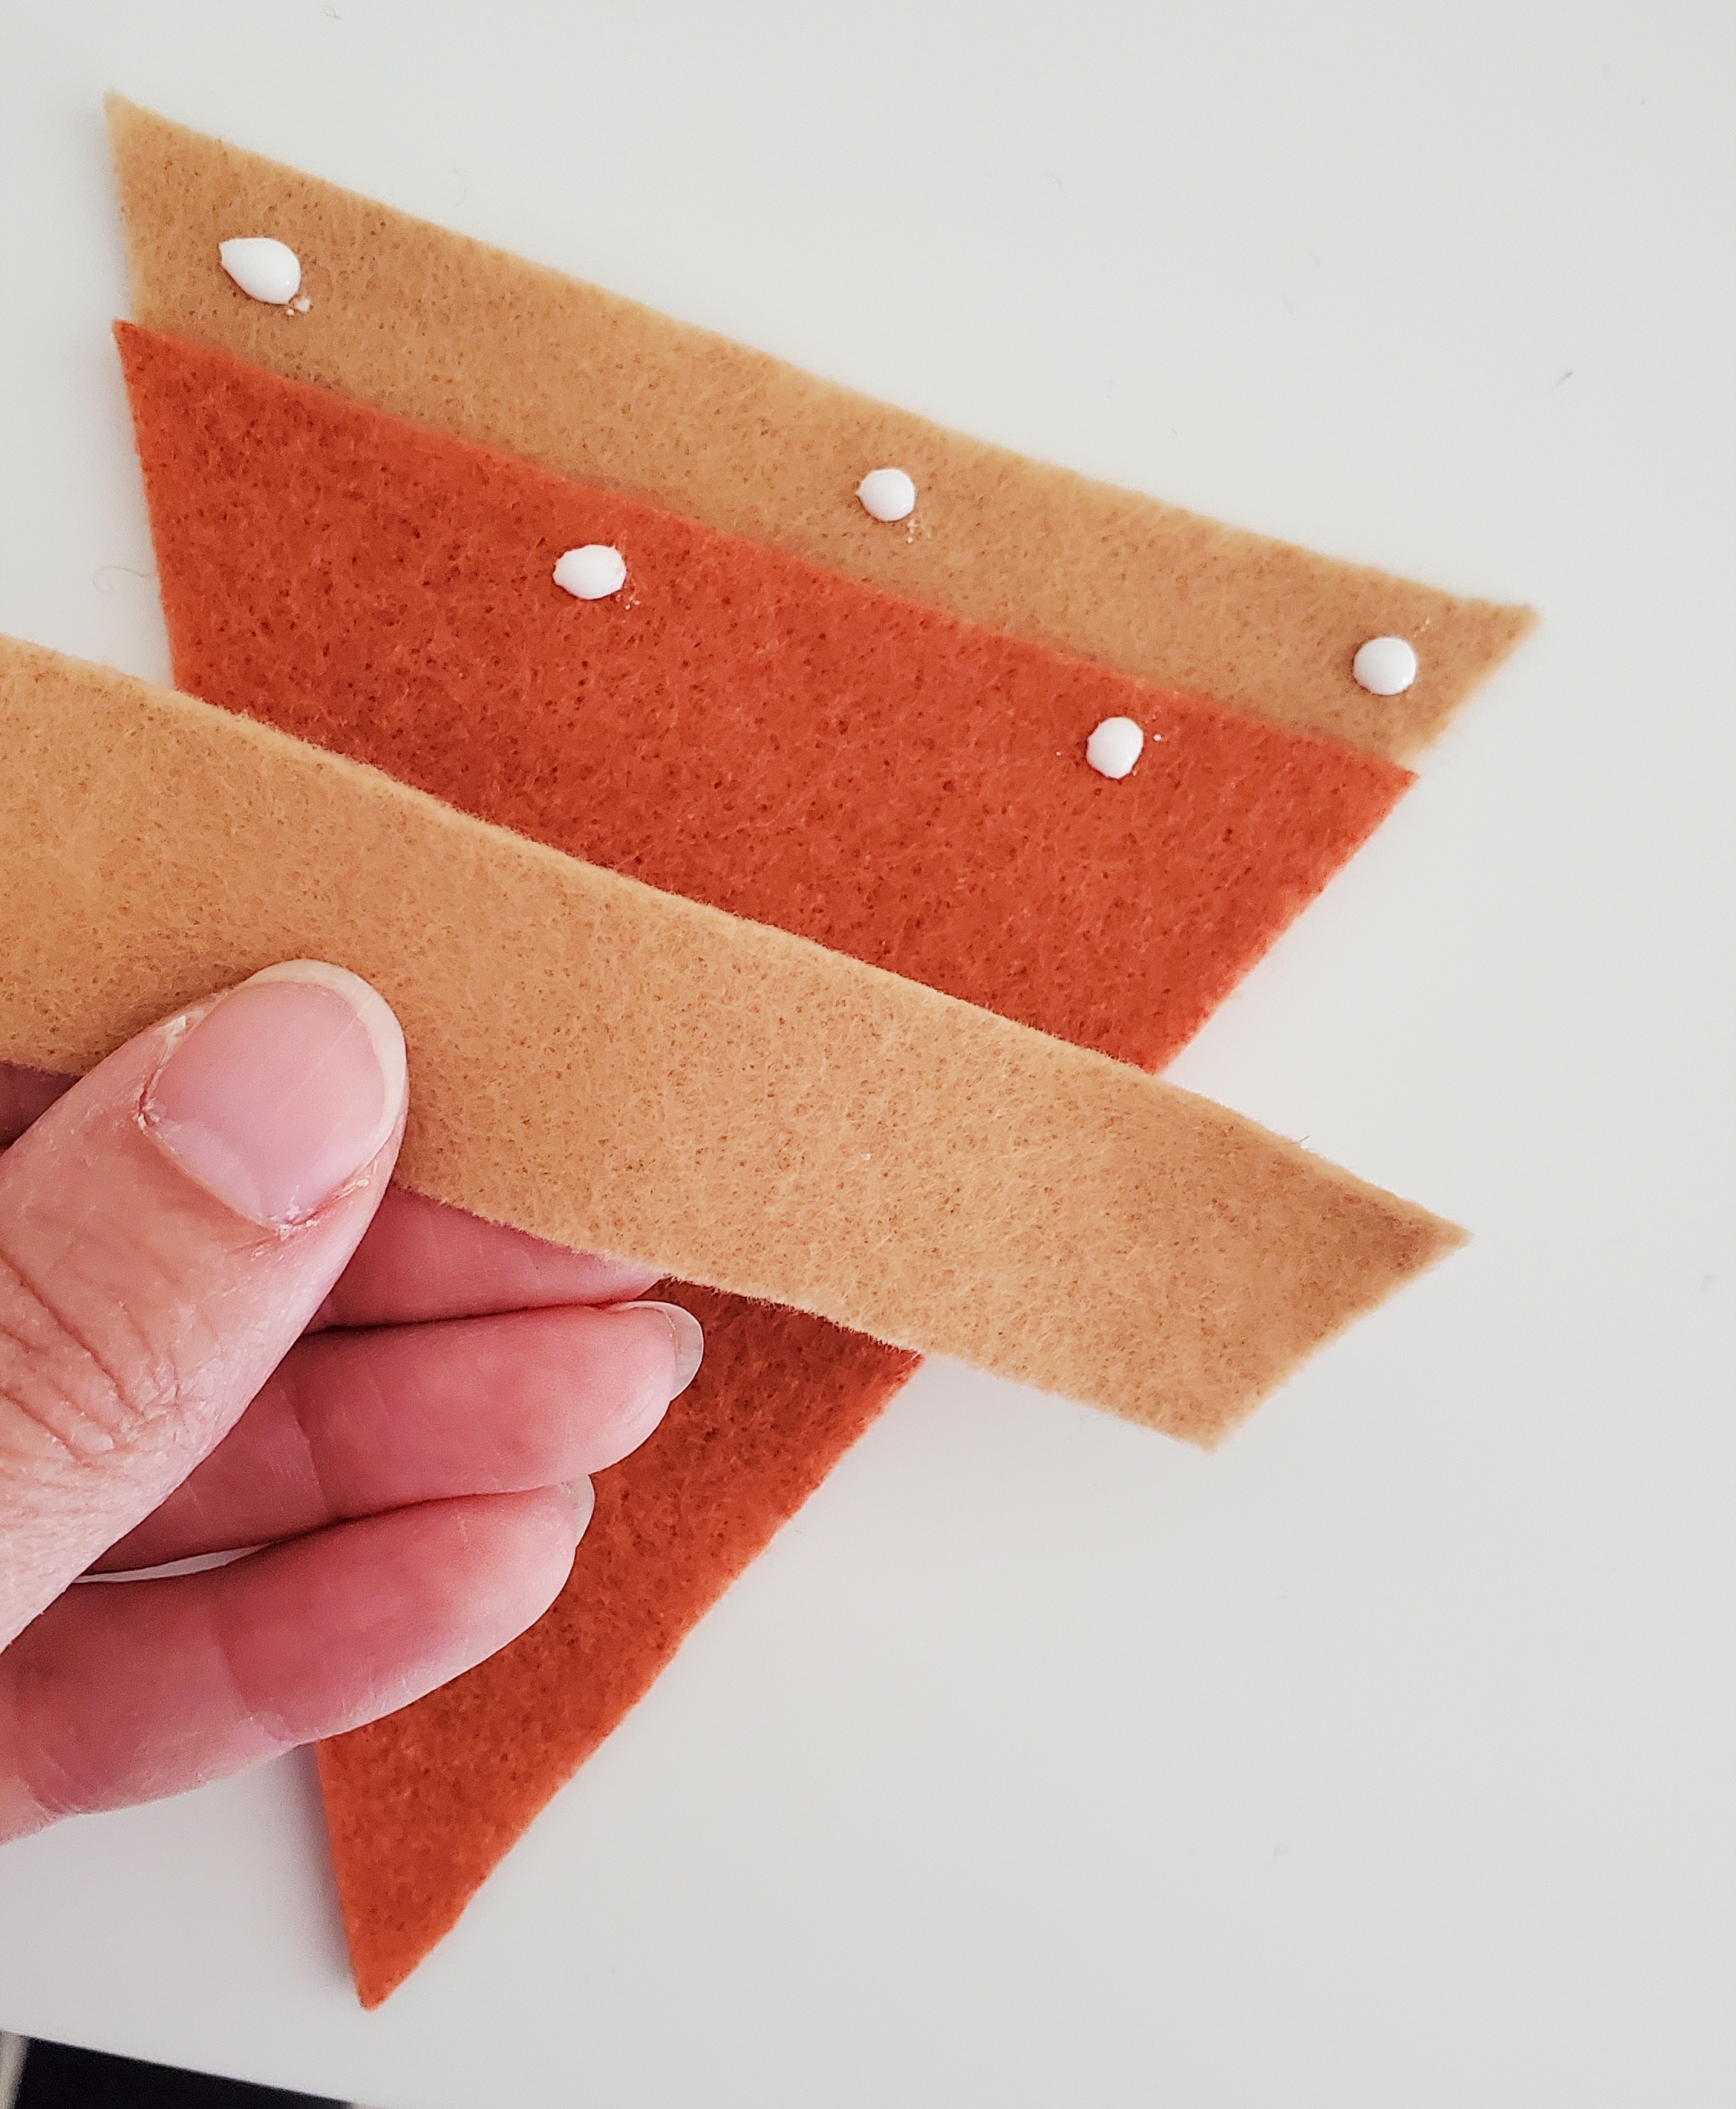
The colors depend on what flavor of pie you want to include. I used a light tan and a darker brown for two types of crust. For the filling, I used orange for pumpkin pie, deep violet for berry pie, and a dark maroon for an apple pie. For whipped cream, use white.
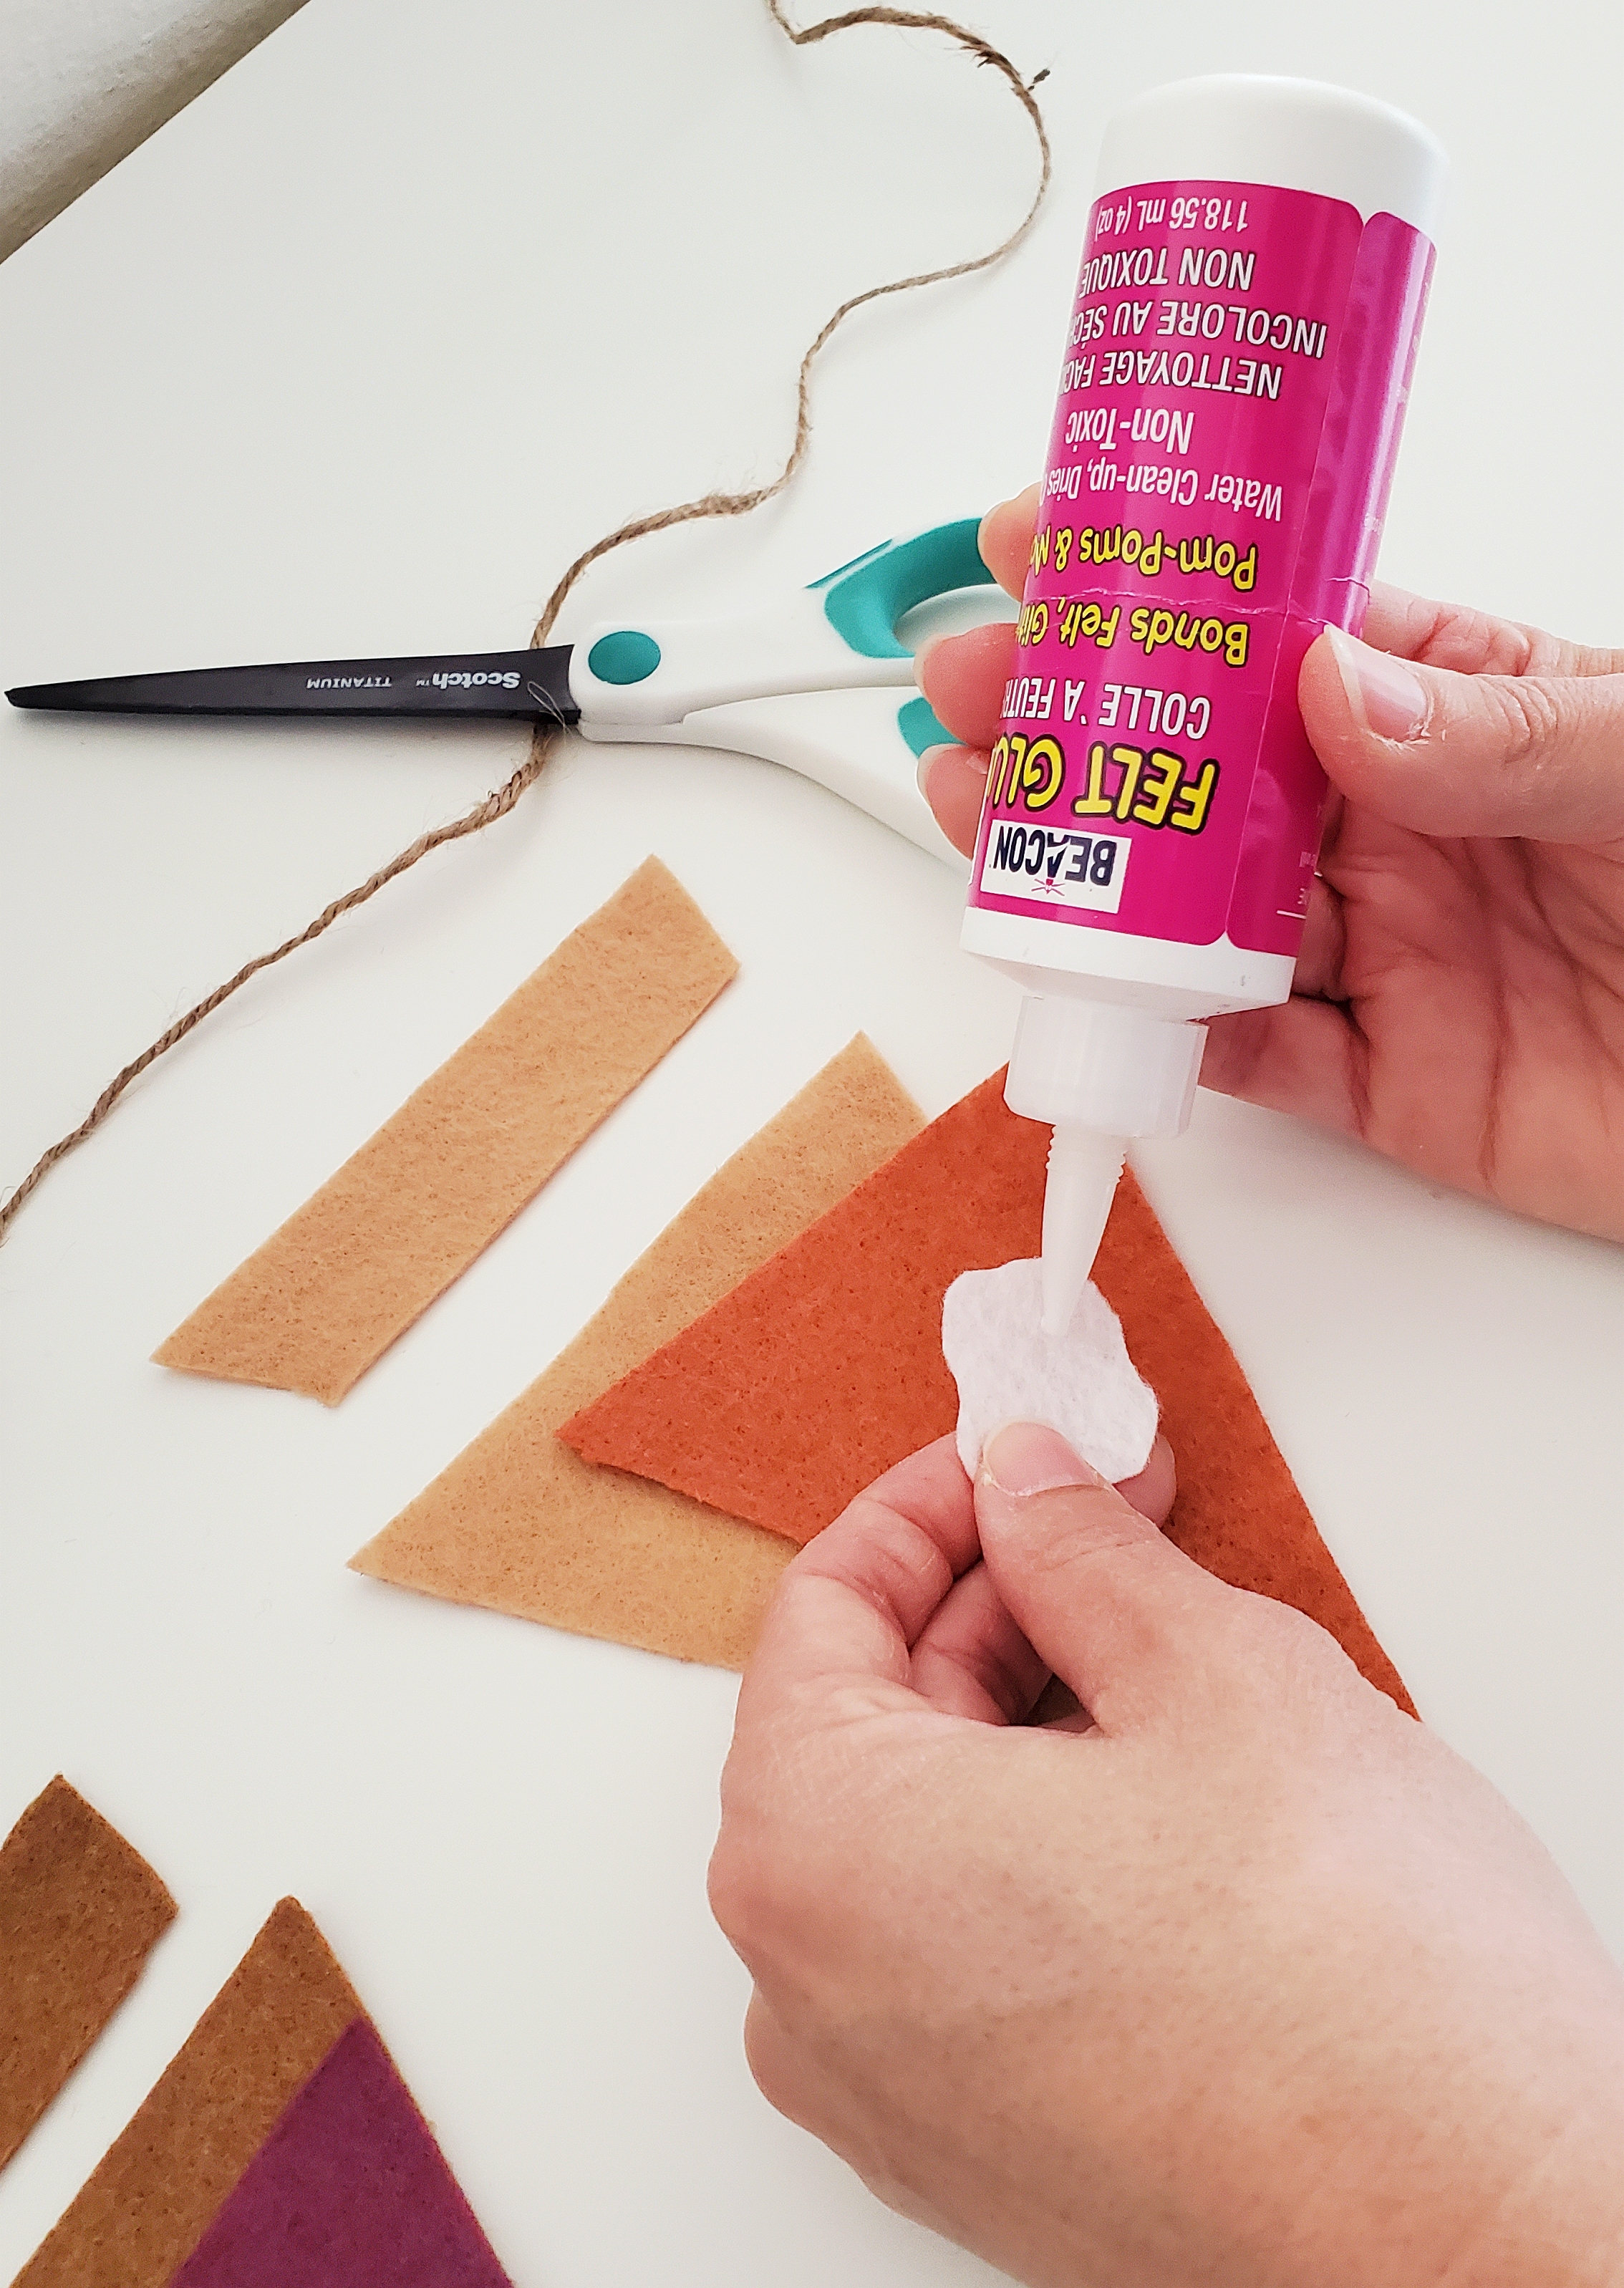
Glue
A hot glue gun or a bottle of felt glue, available at most craft stores.
Jute twine
This is the string to which you will attach all your pie slices. The length you need depends on how long you wish to make your garland.
Sharp scissors
You’re going to want crisp, clean cuts, so make sure you’re using sharp scissors. Dull ones will make the edges jagged and/or fuzzy looking.
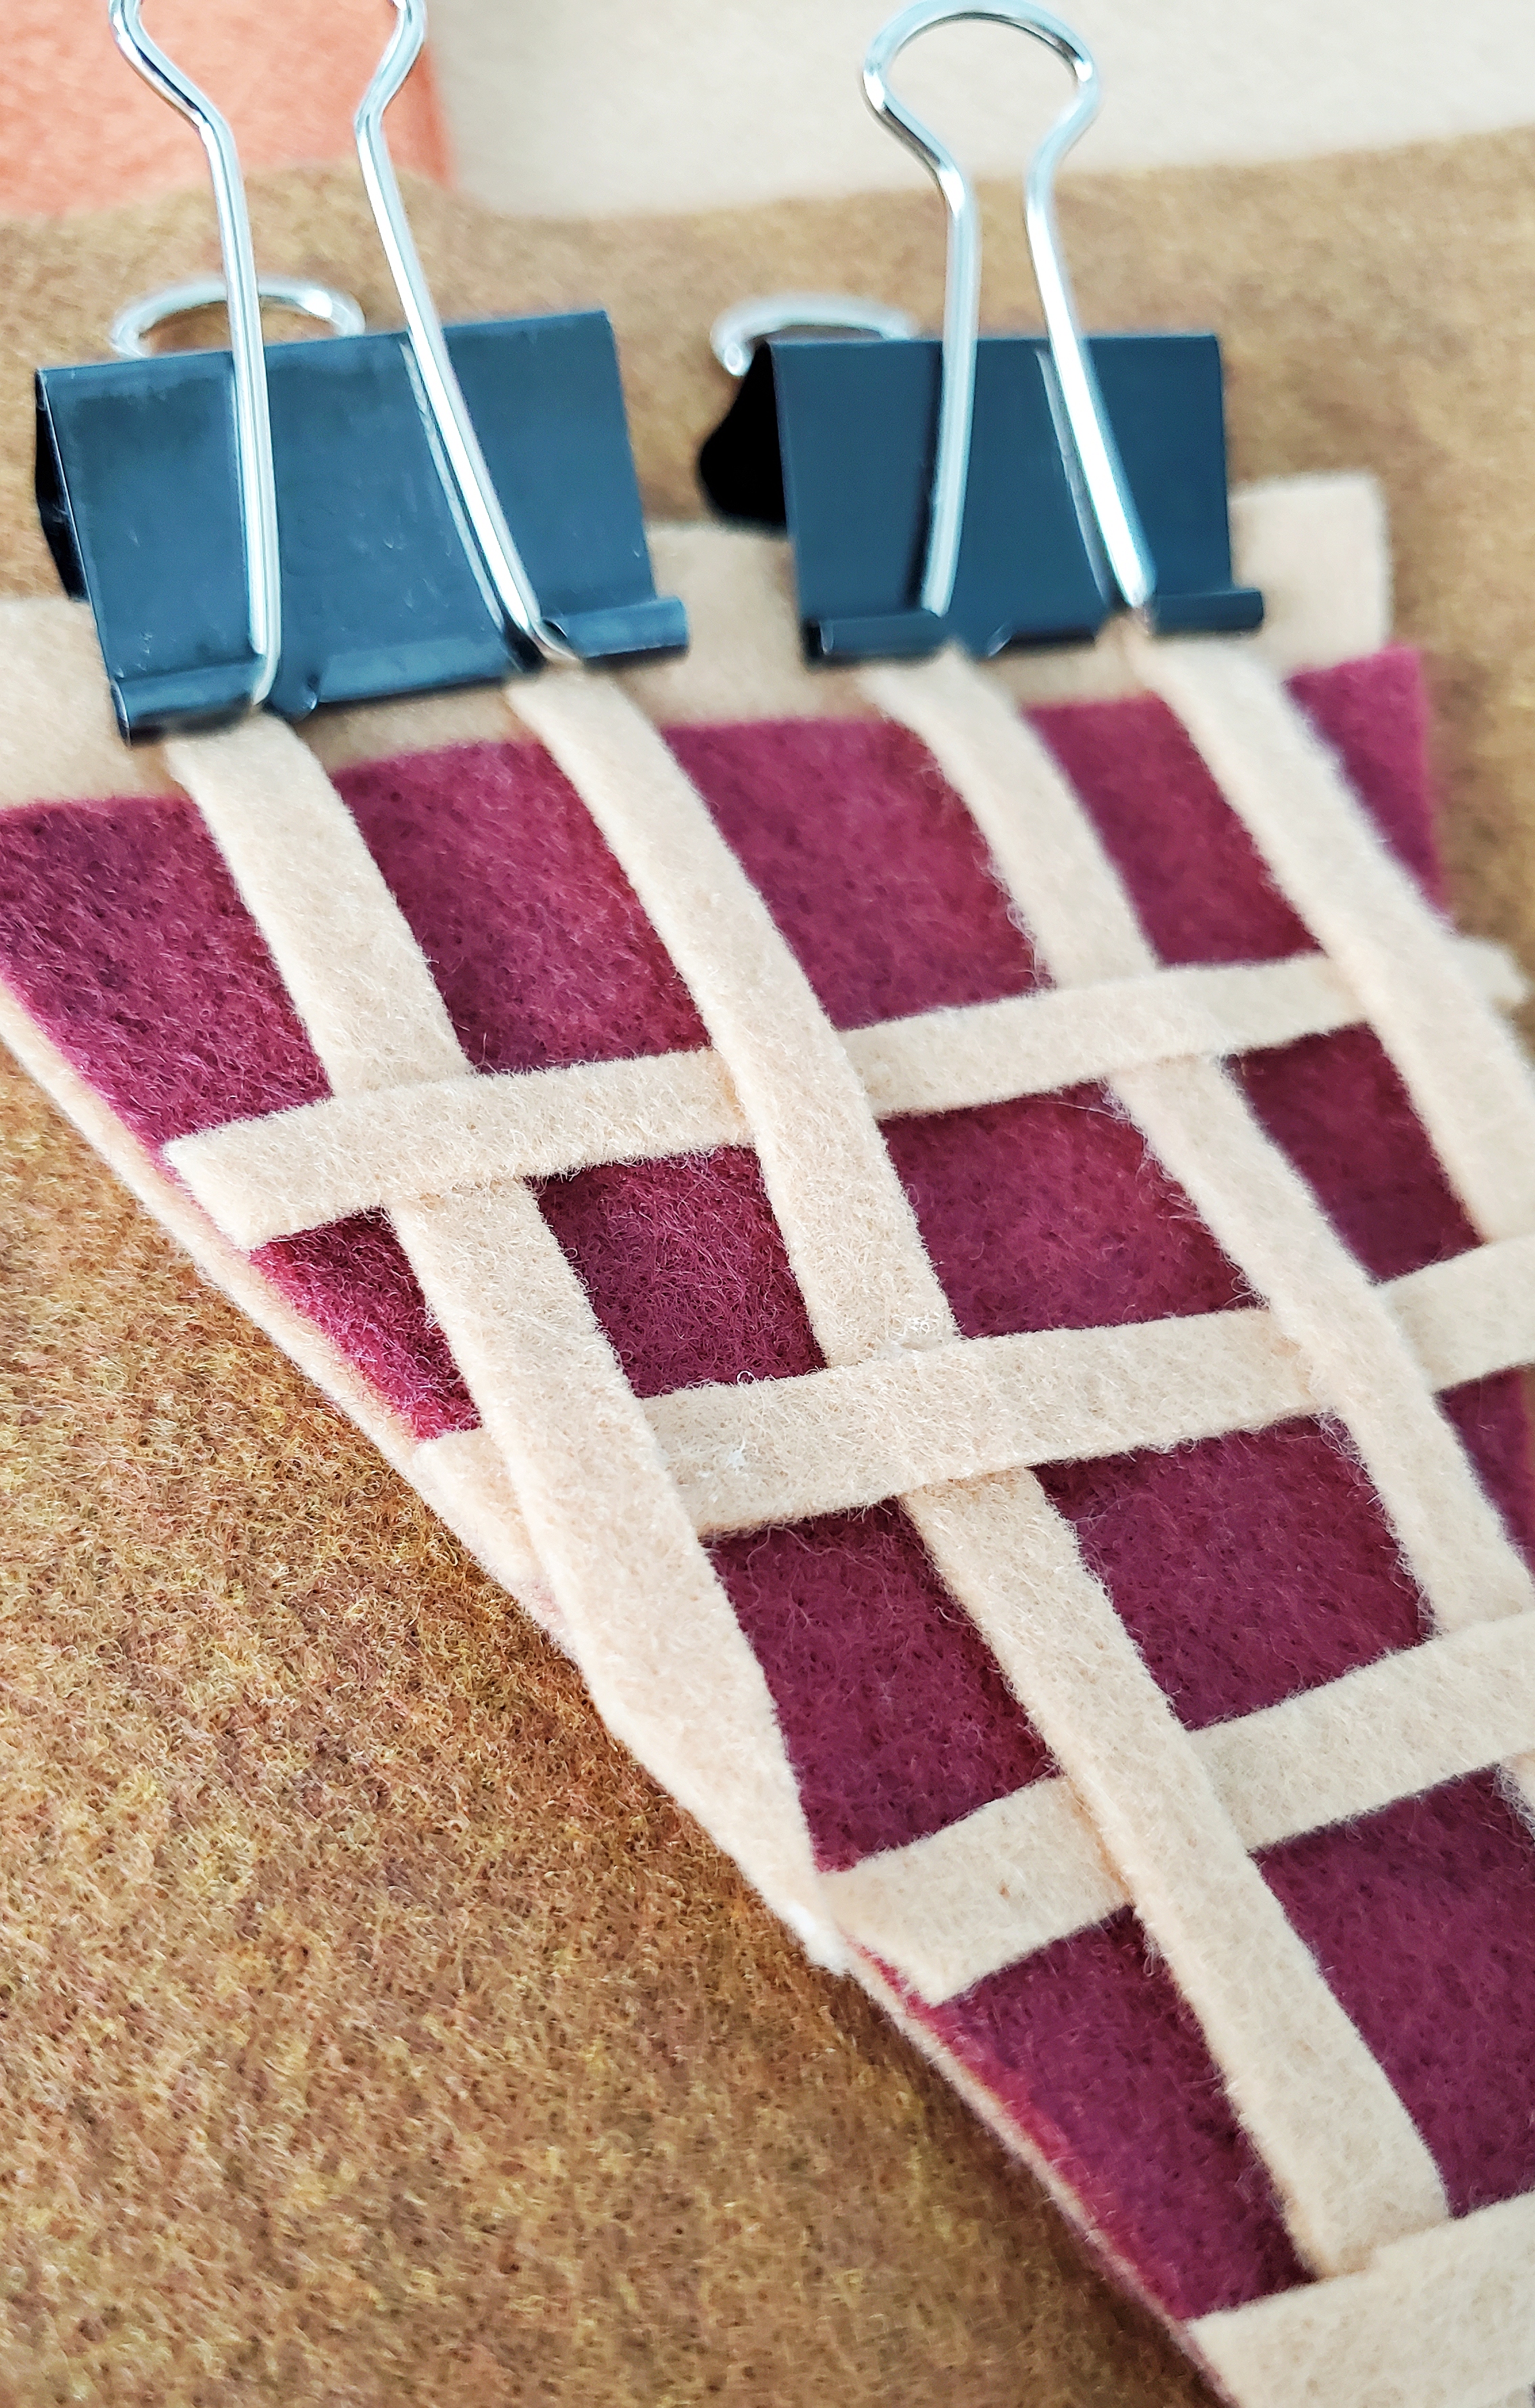
Binder clips
I used binder clips to hold the ends while I worked on the lattice top and braided edges.
For basic assembly
I have a confession: I used another blogger’s help, and I think you should, too! Which is why I highly recommend using the step-by-step instructions at The First Year Blog. She also includes a cutting template for all the basic pieces that can help you get started.

For my unique embellishments
Lattice Top
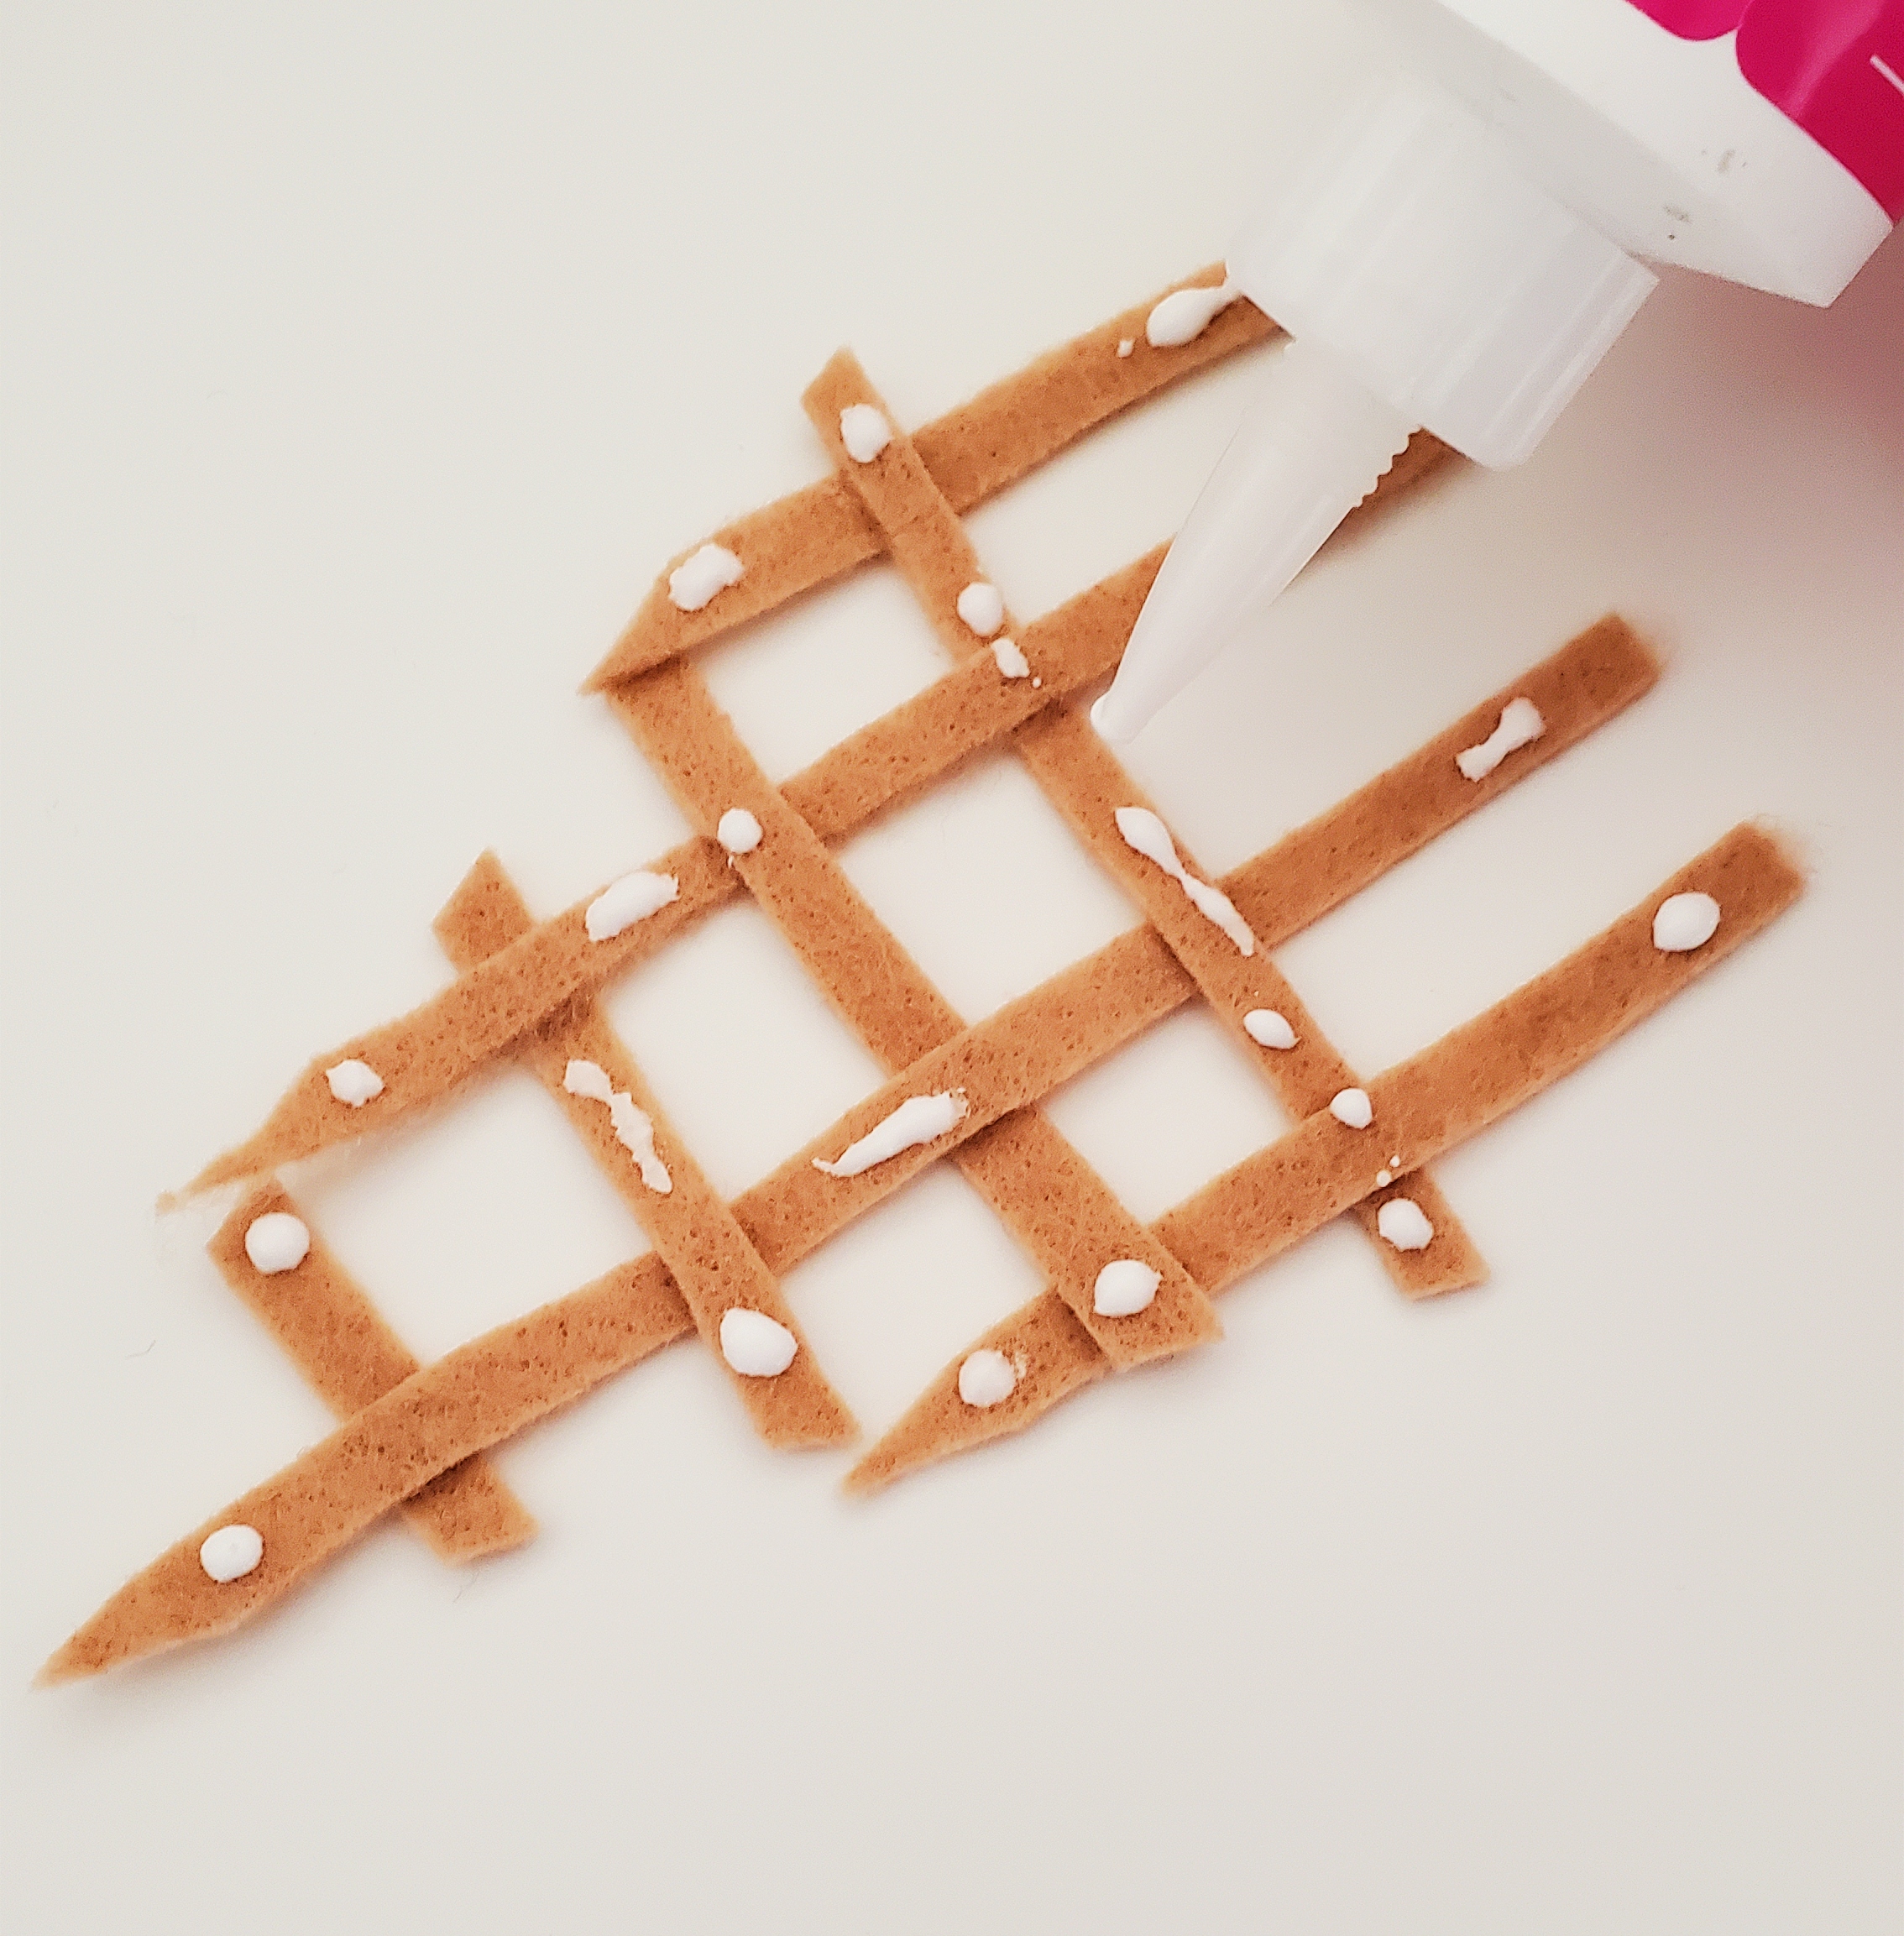
Cut 8 thin strips of the same color felt as your crust. Clip four of them to the top of the pie piece spaced evenly apart. Weave the remaining 4 strips horizontally in a standard lattice pattern. (see photo) Glue all pieces together at every joint. Once dry, trim the lattice top to the same size as the pie slice.
Braided Edge
Cut three strips of the same color as your crust, about an inch longer than standard edge pieces. Use a binder clip to clip them together at one end. Tightly braid them together in a simple three-strand braid. Use a second binder clip to connect all three pieces together at the bottom, as well. Squeeze glue into every overlap along the entire braid. Once it’s dry, slather one face with plenty of additional glue and affix it to the top of the pie slice. Let it dry again. Once it is firmly secure, trim the braid to the width of the pie slice.
Connecting to the Twine
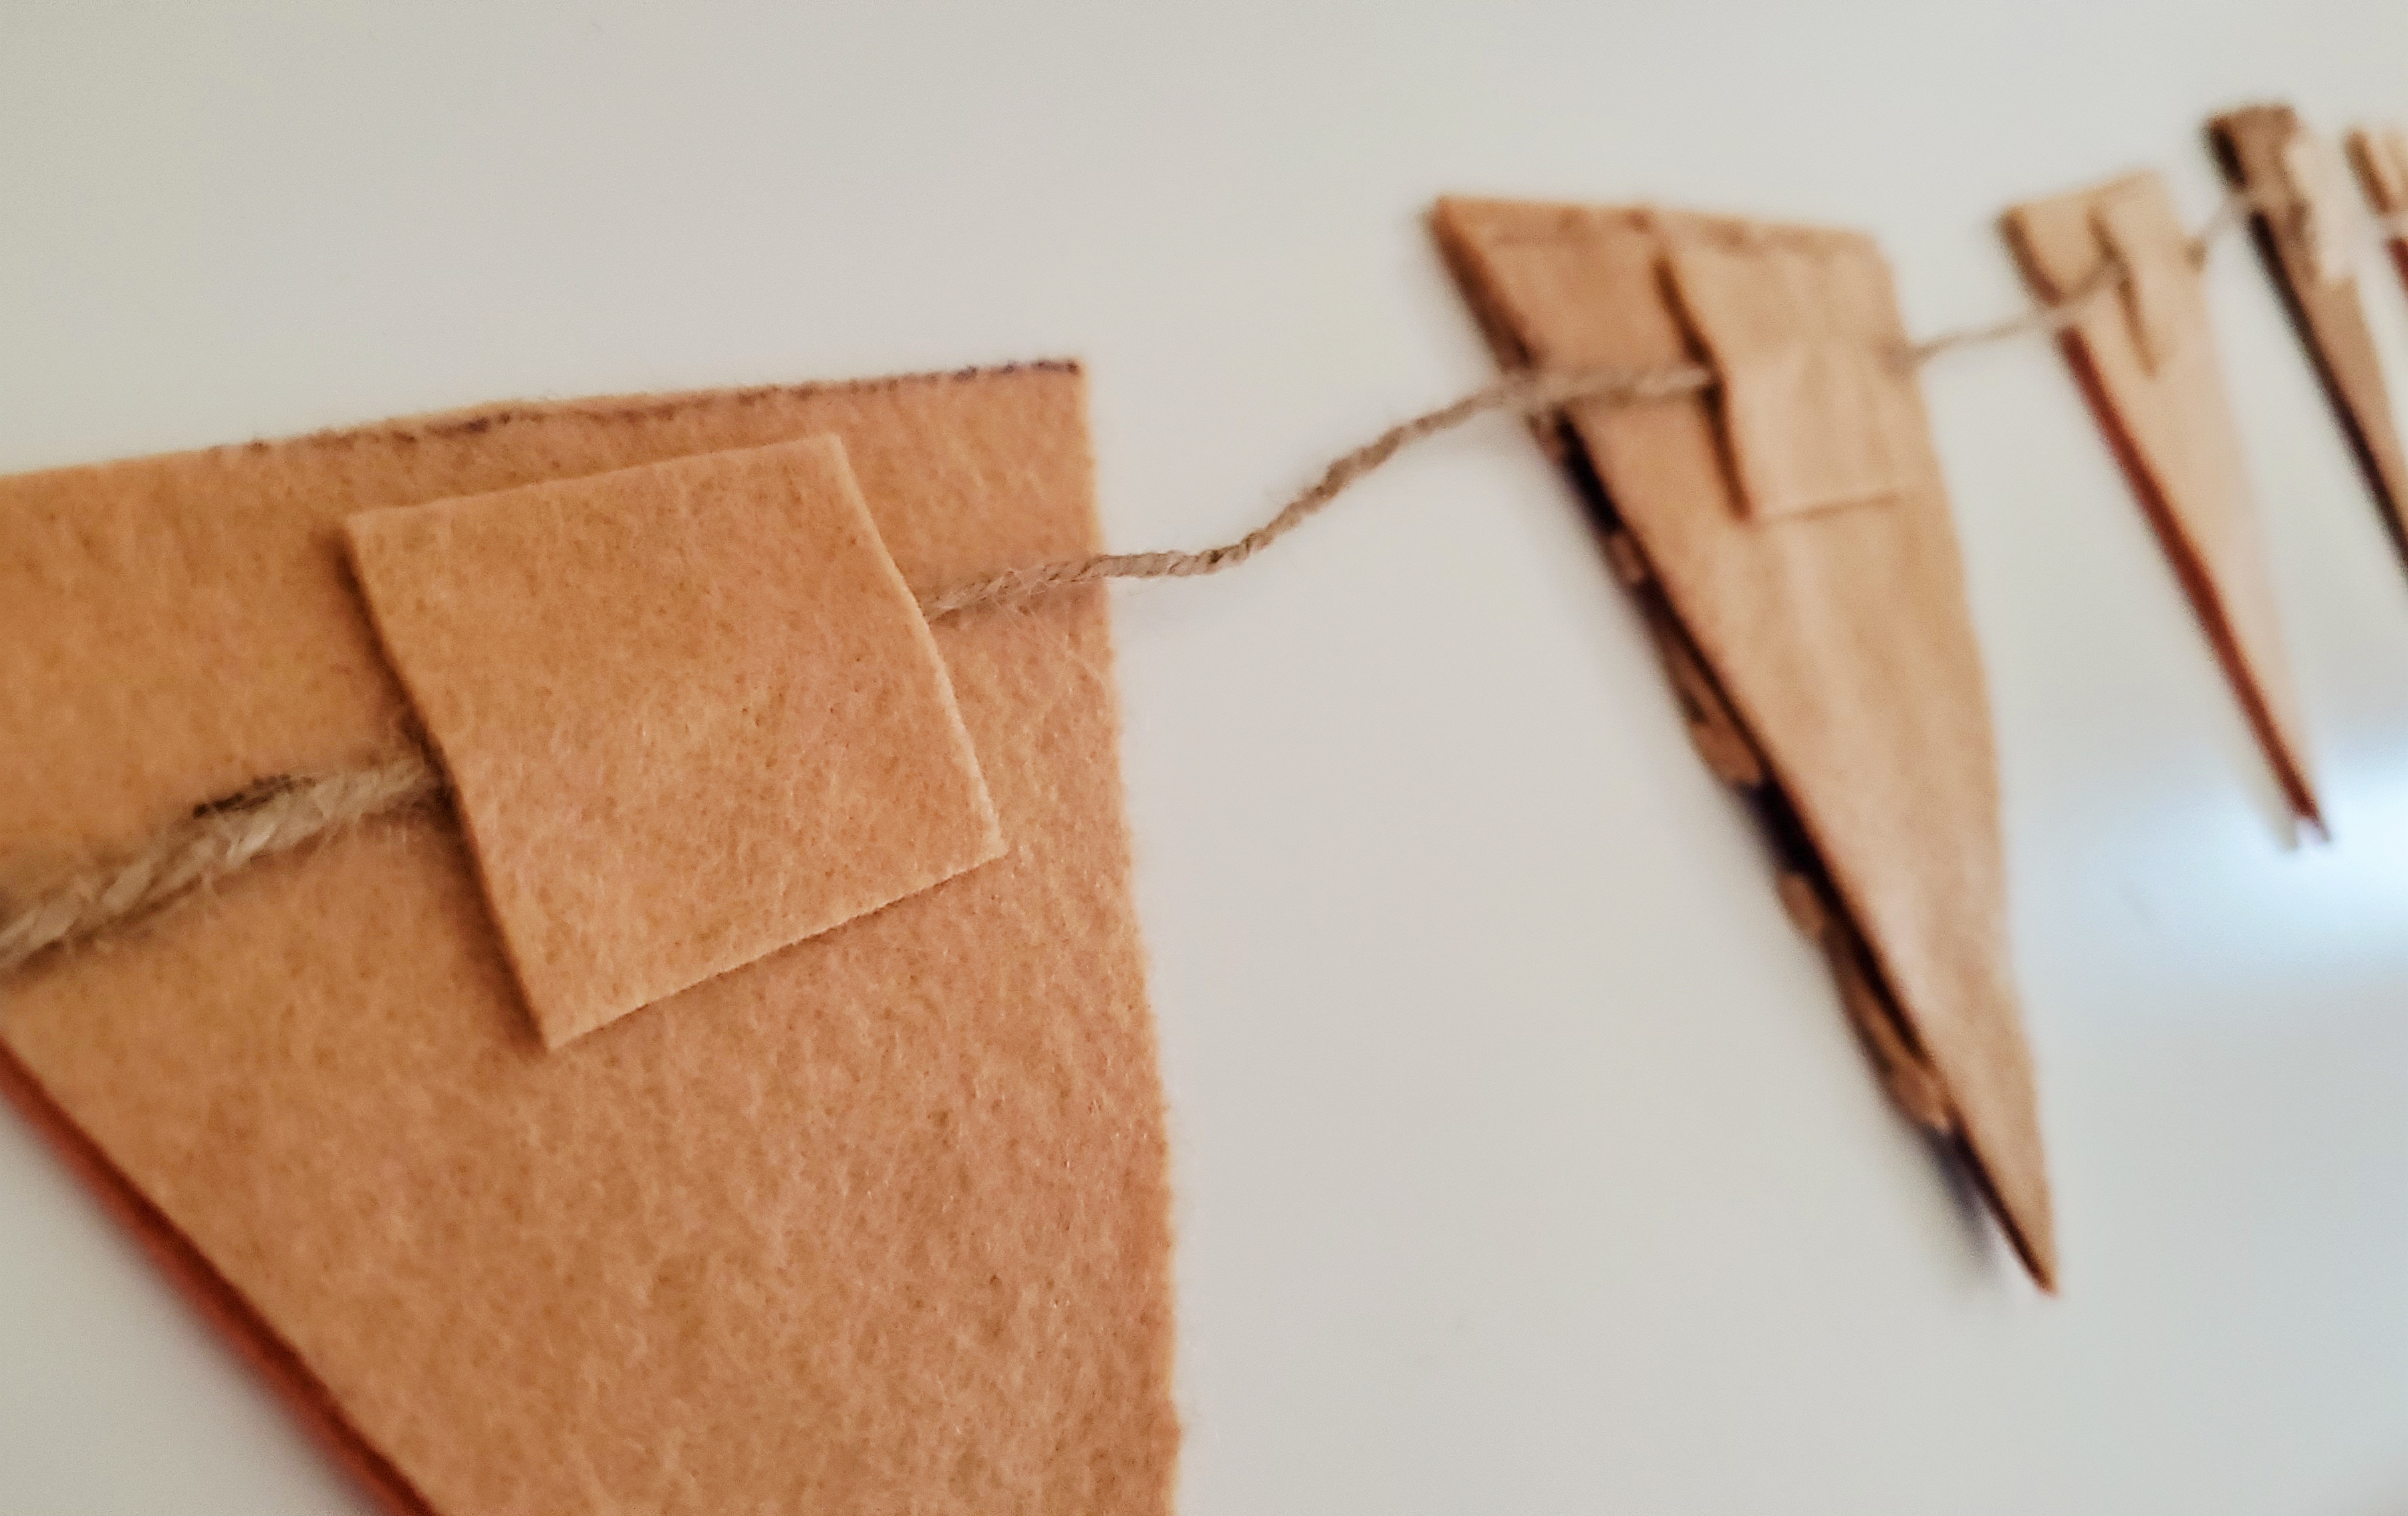
To assemble your garland, glue the twine to the back of each piece of pie. Then, secure it by gluing a square of felt over the twine. (see photos below)

Overall, this project requires some prep, but once all your pieces are cut, it’s great fun for both adults and kids. It would be a fantastic craft for family members to tackle while Thanksgiving dinner is cooking.
And get creative! Want to make your own flavor of pie slice? You’re only limited by available felt colors and your own imagination!