Until now, I was intimidated by the idea of making marshmallows from scratch. Candy making can seem so precise and scary. Turns out, it’s not that complicated! The heat and mixer do all the work. My two tips:
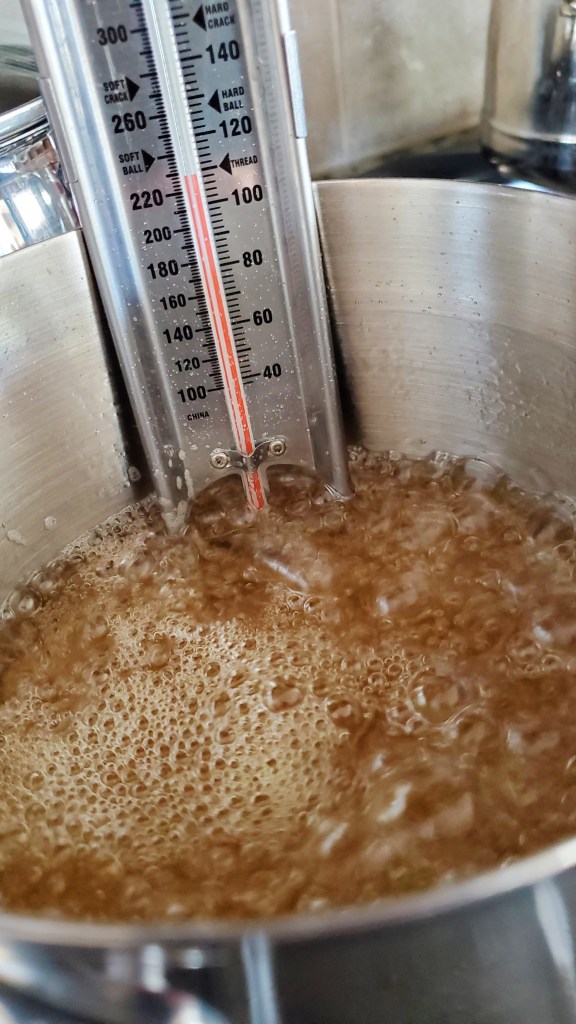
- Make sure you have a candy thermometer so you know just when your syrup is ready.
- Go in knowing they are sticky, so be prepared to get messy when you work with them.
The chemistry behind marshmallows is pretty simple: granulated sugar and corn/agave syrup are heated to a specific temperature (called soft ball stage), then the resulting syrup is whipped into gelatin until it gets fluffy and white. That’s it!
TIP: Traditionally, corn syrup is used to make marshmallows. If you’d like to use a cleaner, less processed product, you can substitute agave syrup, like I did.
NOTE: If you just need marshmallow cream – for making rice cereal treats for example – you don’t need to set it out overnight. As soon as you’re finished whipping in the stand mixer, it’s ready to go! Just pour in your rice cereal and allow the mixture to set like usual. You can even substitute marshmallow cream for meringue as the topping for a pie!
Homemade Marshmallows
(Original recipe: Preppy Kitchen)
2 TBSP neutral oil
1 C confectioners’ sugar 100g
4 tsp (1/2 oz or 2 envelopes of Knox) unflavored gelatin
1-1/2 C granulated sugar
1 C light corn or agave syrup
1/4 tsp salt
2 tsp vanilla extract
1 cup water, divided

Using neutral oil, brush the bottom of a 9-inch baking pan. Dust your pan using confectioner’s sugar. Make sure it is well covered so your marshmallows don’t stick.
In the bowl of a standing mixer, add 1/2 cup of water and 2 gelatin packages. Stir and set aside, allowing the gelatin to bloom.
In a large saucepan over medium heat, combine the corn/agave syrup, salt, 1/2 cup water, and granulated sugar. Bring to a boil. Stir the sugar until it has dissolved. Once the sugar has dissolved, stop stirring.
Place the candy thermometer into the syrupy liquid and allow it to boil until the temperature reaches 240F. Do not stir at all during this time. Once it reaches temperature, remove from the heat.
Turn your stand mixer on low speed and slowly pour the hot syrup into the bloomed gelatin. Once combined, gradually increase the mixer speed to high. Beat about 10 minutes, or until the marshmallow forms a thick ribbon once the whisk has been removed. Once the desired consistency is reached, mix in the vanilla extract.
Transfer the marshmallow to the prepared pan. It will be sticky! You can use a spatula or wet your fingers to spread the marshmallow evenly and smooth the top. Allow it to sit, uncovered at room temperature for at least 4 hours.
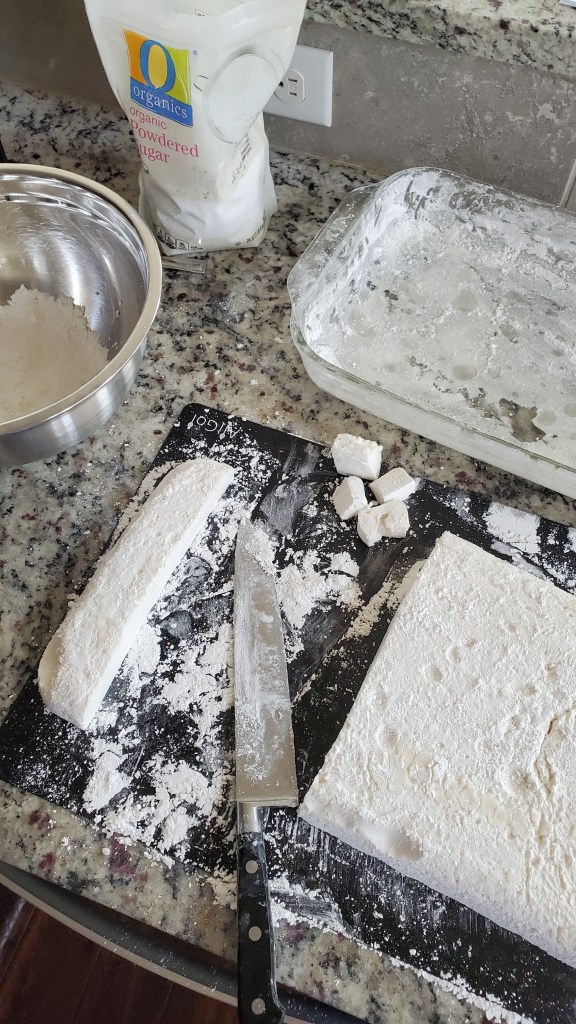
Once it’s set, it’s time to cut! Dust a cutting board using confectioner’s sugar. Use an oiled spatula to gently pull the marshmallow from the pan’s sides and bottom. Use your hands to place the marshmallow on a cutting board.
Dust the top with more confectioner’s sugar. Cut the marshmallow into the desired number of pieces, dusting the knife between each cut. Toss the cut marshmallow in confectioner’s sugar so they don’t stick together.
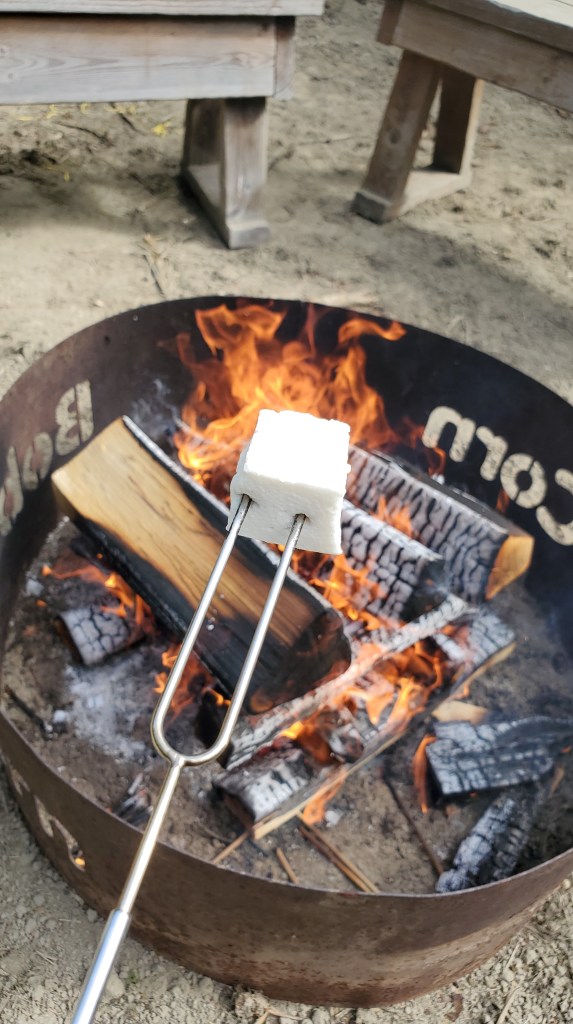
TIP: If you intend to use them for s’mores, make sure you allow your marshmallows to dry out at room temperature for 2-3 days. This will assure they don’t melt too quickly as soon as they get near the heat from the fire.
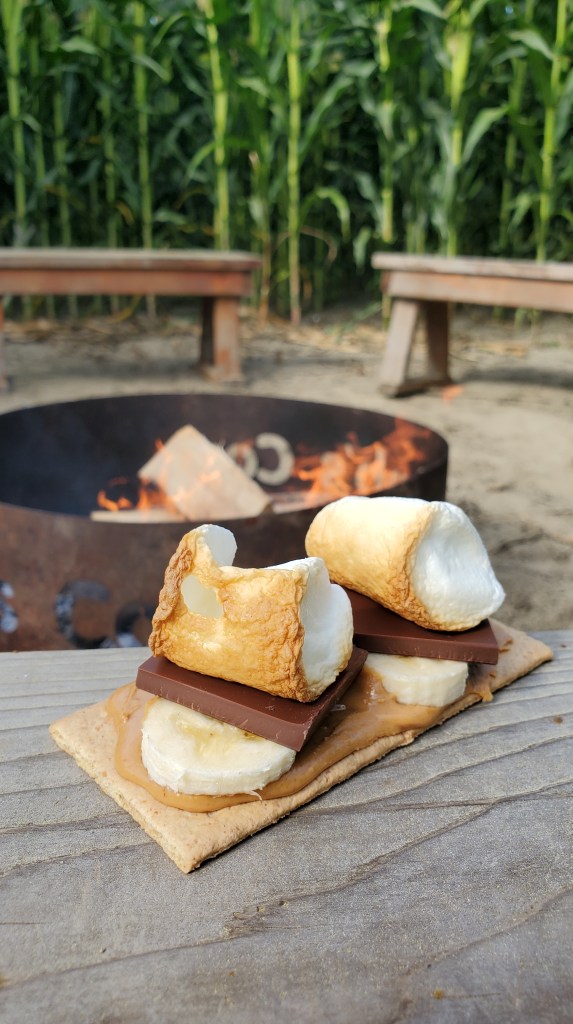
Once you’ve got your fresh batch of homemade marshmallows, it’s time to make some s’mores!
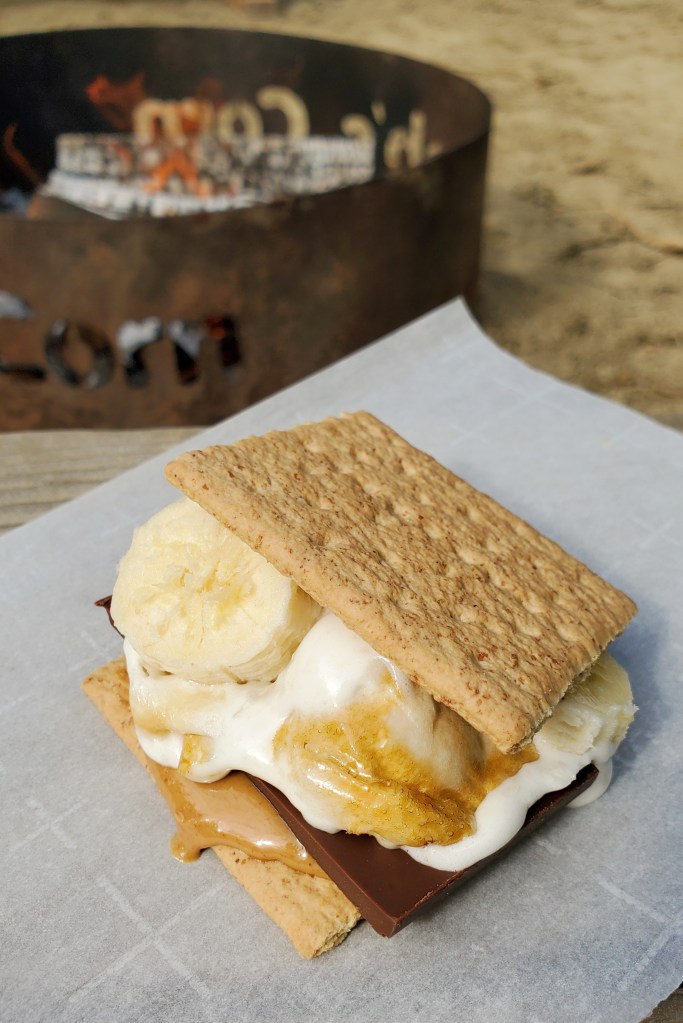
One of my favorites s’mores additions is peanut butter and/or banana slices. Simply spread some peanut butter on the graham cracker, place your chunk of chocolate followed by your melted marshmallows, top it with a few banana slices before the final graham cracker, and enjoy!
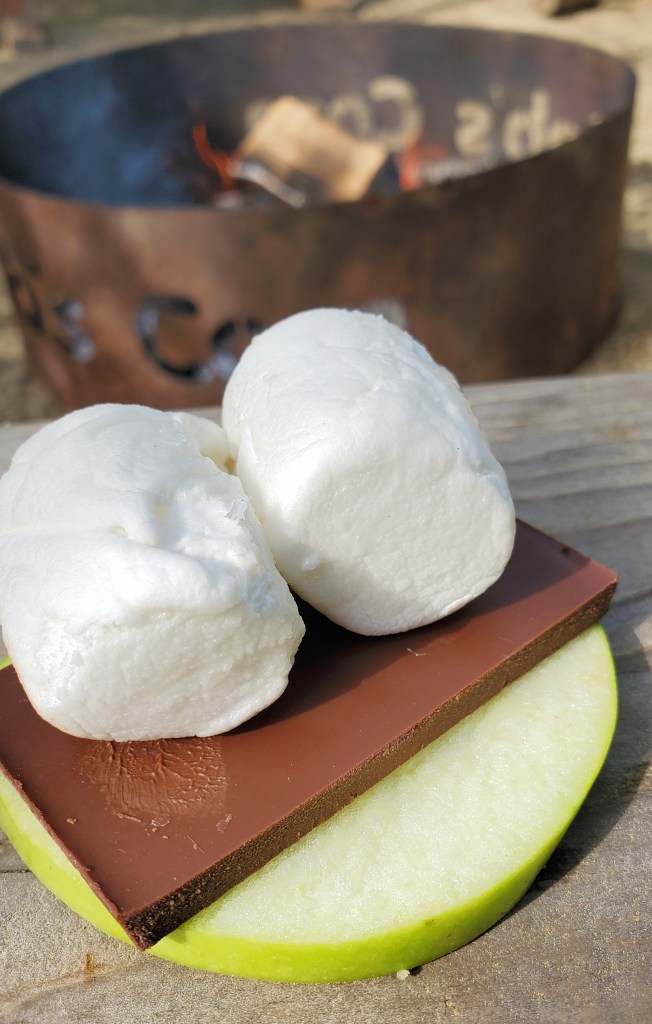
If you need to avoid gluten, have you tried substituting the graham cracker for an apple slice? It works great!